
Tissue types and body-organization model
Do now
Build a body-organization model that links the four tissue types to organs and systems.
- Hand in
- Model card or poster showing five levels of structural organization, four tissue types, and one example location per tissue type.
- Where
- Turn this in at the drop folder with your district Microsoft sign-in, or hand it to Mr. Mendoza in class. Both count as submitted. Doing the activity in myPLTW does not.
You get two school days for every day you were absent, so this deadline moves with you.
Your stomach digests food, holds acid, and squeezes to move it along. Which of the four types is doing each of those jobs, and how do they stack up into one working organ?
Build a body-organization model that links the four types to organs and systems.
- • You can name the four types and an example of each.
- • You can order the levels of structural organization correctly.
- List the four primary types if you can recall them; if not, write the four body parts you think are made of the most different 'stuff.'
- Put these in order from smallest to largest: organ, cell, organism, , .
- 1Read the notes on the four primary tissues: , , muscle, and nervous.
- 2Match each type to one example location in the body.
- 3Build a model card or poster ordering the levels: cell, , organ, , organism.
- 4Add one example to each level of your model where it applies.
- 5Submit a photo of your body-organization model with labels.
What did this day actually feel like?
Tissue types and organization model
BUILD Four primary tissues: epithelial, connective, muscle, nervous. Every structure in the body is built from combinations of those four, arranged from cell to tissue to organ to system to organism.
We built a model card showing all five levels. Doing it as an object rather than a list made the hierarchy stick, because you have to decide what sits inside what.
Turned in: organization model photo → Lab Notebooks folder
Fiction. There is no such student. The lessons, labs and dates are the real planned course; the student, the classmates and the conversations are invented.
The same day, drawn.
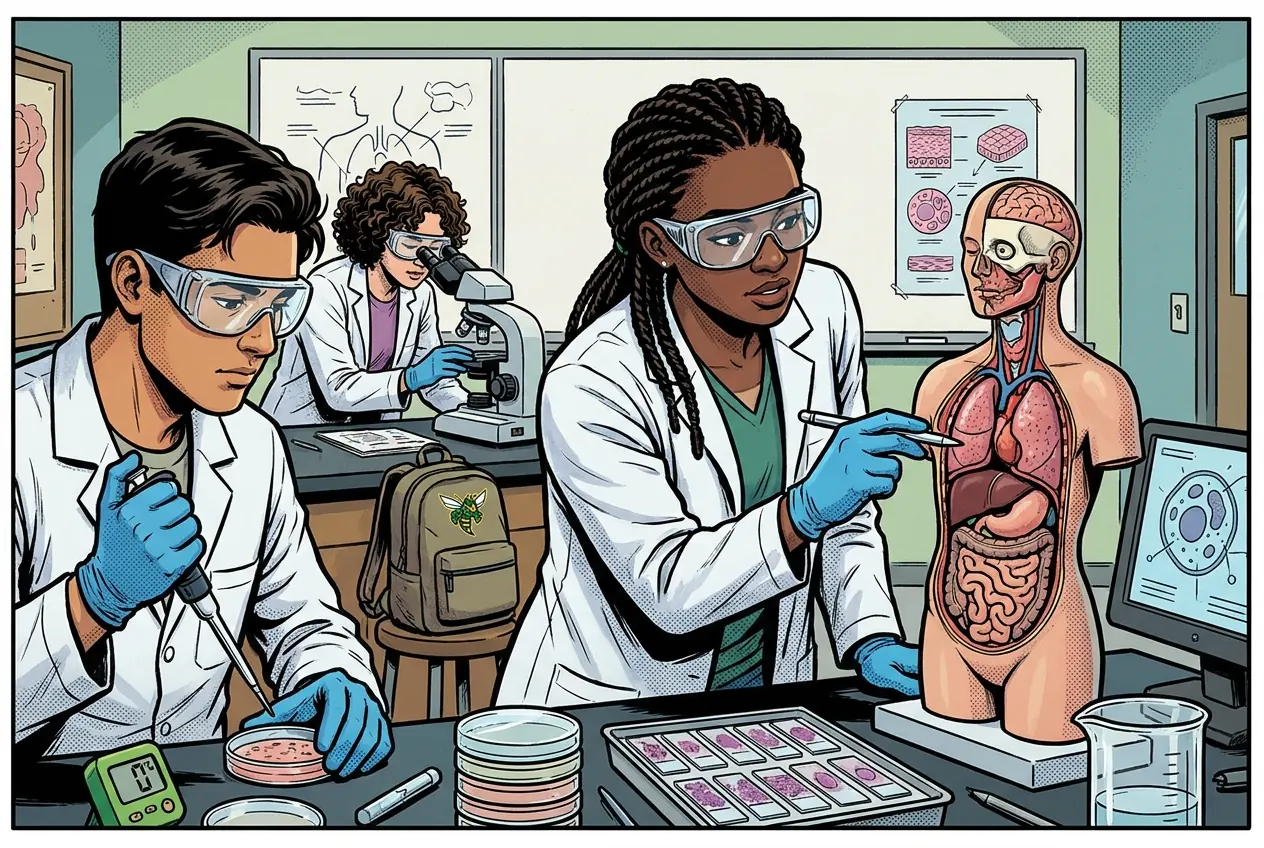
Four tissue types, and every organ we will meet this semester is some arrangement of them. Build the model once and you stop memorizing lists.
Fiction. There is no such student. The lessons, labs and dates are the real planned course; the student, the classmates and the conversations are invented.
🛠 Get unstuck · pick your level
🔑 Today's words · 5
Tap a word in the lesson for a plain meaning and one example. Recycled into next week's Do-Now.
Do the work · 80-minute blockfirst 5 min = hook▸
💡 Big idea: All body structures are built from only four types arranged from cell to organism, so identifying which tissue is affected is often the first step in diagnosing where a disease actually begins.
- 0-8Intro: four types overview with real images
- 8-25Notes: , , muscle, nervous locations and functions
- 25-45Build model card: five levels of organization with examples
- 45-60Group review: does each level have a example? fix gaps
- 60-75Photograph and label completed model
- 75-80Submit photo; preview Thursday patient-scenario day
- • Every organ in the body is made of the same four building materials: , , muscle, and nervous .
- • Today you are going to build a model that shows how those materials stack up into organs and then into systems.
- • This model is not decorative. You will reference it when we get to bone next week and muscle tissue the week after.
- • By the end of class your model card should be complete enough that a friend could use it to study from.
- • The four primary types are , , muscle, and nervous. Each has a distinct structure and function.
- • Levels of structural organization from smallest to largest: cell, , organ, , organism.
- • Pathophysiology often begins at the level; identifying which tissue is affected guides diagnosis and treatment.
Unit 1.1 Beginning with Bones: Patient rehabilitation context, regional/directional terms, body cavities/planes, tissue structure. · types and body-organization model
Day 3 of this lesson. Open this exact section in myPLTW (find it in Clever, Microsoft sign-in), then do the work below.
Do this: Complete the -types task in Lesson 1.1 Beginning with Bones on myPLTW during the note-taking window; work through all required tissue-identification screens.
Mark the -types task complete after submitting your body-organization model photo.
matching is done; today the -types task should show complete and your model should be photographed.
myPLTW completion status plus labeled model photo.
The official PLTW activity stays inside myPLTW. If myPLTW will not open, use F1 and E1-E3 on this page to complete today's local evidence decision, then make up the official activity when access returns. Turn this in at the drop folder with your district Microsoft sign-in, or hand it to Mr. Mendoza in class. Both count as submitted. Doing the activity in myPLTW does not.
Check things off as you work, then submit. This tells Mr. Mendoza how you're doing so he can help the class. It does not replace turning in your producible through the submission route shown below.
Use the code Mr. Mendoza gave you, not your name. Saved on this device.
Unit 1.1 Beginning with Bones: Patient rehabilitation context, regional/directional terms, body cavities/planes, tissue structure. · Tissue types and body-organization model
Complete the -types task in Lesson 1.1 Beginning with Bones on myPLTW during the note-taking window; work through all required tissue-identification screens.
matching is done; today the -types task should show complete and your model should be photographed.
This is how Mr. Mendoza sees the class keeping pace with PLTW. Be honest, it only helps if it is accurate.
🎯 Build a body-organization model that links the four types to organs and systems.
- Read the notes on the four primary tissues: , , muscle, and nervous.
- Match each type to one example location in the body.
- Build a model card or poster ordering the levels: cell, , organ, , organism.
- Add one example to each level of your model where it applies.
- Submit a photo of your body-organization model with labels.
Notebook check: Model card or poster showing five levels of structural organization, four types, and one example location per tissue type.
Turn this in at the drop folder with your district Microsoft sign-in, or hand it to Mr. Mendoza in class. Both count as submitted. Doing the activity in myPLTW does not. Use the checklist just below and upload by 11:29 PM for full credit. Absent with an excused absence? You get two school days for every day you were absent, so this deadline moves with you.
| Task | Who |
|---|---|
| Read the notes on the four primary tissues: , , muscle, and nervous. | _______ |
| Match each type to one example location in the body. | _______ |
| Build a model card or poster ordering the levels: cell, , organ, , organism. | _______ |
| Add one example to each level of your model where it applies. | _______ |
| Submit a photo of your body-organization model with labels. | _______ |
Working solo? Put your own name in "Who" for every row.
- You can name the four types and an example of each.
- You can order the levels of structural organization correctly.
- 1Do thisBuild a body-organization model that links the four tissue types to organs and systems.
- 2Use this resource
- 3Submit thisNotebook check: Model card or poster showing five levels of structural organization, four tissue types, and one example location per tissue type.
- 4Submit it here
- 1Open the drop folder.
- 2Sign in with your district Microsoft account, not a personal one.
- 3Upload the file, named Lastname_Firstname__Assignment Title.
- 4Your own upload panel says Uploaded with a green check: that is your receipt.
Turn this in at the drop folder with your district Microsoft sign-in, or hand it to Mr. Mendoza in class. Both count as submitted. Doing the activity in myPLTW does not. Human Anatomy & Physiology (Human Body Systems) › Unit 1.1 Beginning with Bones: Patient rehabilitation context, regional/directional terms, body cavities/planes, tissue structure. › Notebook checkOpen the drop folder
Learn it · deck, reading, and vocabulary▸
The deck carries the prior idea forward, lets you inspect an analogy, maps the rule to biology, and ends with the same evidence decision and exit ticket used on this page.
Generated from this lesson's canonical data with a red-team citation check.
Radiologists and surgeons name every location by plane and so that any reader locates the exact same spot with no ambiguity, because a shared code removes guesswork from a report.
All body structures are built from only four types arranged from cell to organism, so identifying which tissue is affected is often the first step in diagnosing where a disease actually begins.
A bridge prototype is tested against a load limit, cost limit, and user need before revision.
- Which requirement is a criterion?
- Which limit is a constraint?
- What test result should trigger a redesign?
A design improves when evidence is compared with explicit criteria and constraints.
Biomedical designs also require , ethics, and biological validation beyond a physical prototype test.
- • Bridge requirements map to design criteria.
- • Load results map to E1-E3.
- • Revision maps to the next evidence-based iteration.
Driving question: Your stomach digests food, holds acid, and squeezes to move it along. Which of the four types is doing each of those jobs, and how do they stack up into one working organ?
What you already know: Radiologists and surgeons name every location by plane and so that any reader locates the exact same spot with no ambiguity, because a shared code removes guesswork from a report.
New idea: All body structures are built from only four types arranged from cell to organism, so identifying which tissue is affected is often the first step in diagnosing where a disease actually begins.
Visual or model: F1. F1. A lesson illustration or teaching diagram for Tissue types and body-organization model. Use it with E1-E3; it is a model or context image, not experimental or patient data. What to notice: Trace the labeled structure, movement, or system relationship that connects form to function.
- Observe or measure the relevant feature in types and body-organization model.
- Organize the observation with a stable evidence ID.
- Apply this rule: A design improves when evidence is compared with explicit criteria and constraints.
- Choose the option the evidence supports and state the limit of the conclusion.
Real biomedical example: Your stomach digests food, holds acid, and squeezes to move it along. Which of the four types is doing each of those jobs, and how do they stack up into one working organ?
What the evidence supports: E1-E3 and F1 support the daily take-home when the response meets the stated success criteria.
What it cannot prove: The package does not support claims beyond this lesson's or any real patient diagnosis.
- • : Describing an anatomical plane or cut that divides the body into left and right parts, running front to back.
- • : An anatomical plane or direction at the front of the body, including the of the forehead and the plane dividing front from back.
- • : An anatomical plane that runs horizontally across the body, dividing it into upper and lower sections.
- • : A hollow space inside the body that holds and protects organs, such as the chest around the heart and lungs.
- • : A group of similar cells working together to perform a shared function, such as muscle, nerve, or .
- • : Relating to the sheets of tightly packed cells that line and cover body surfaces, organs, and cavities and form protective barriers.
- • : A type that supports, binds, and protects other tissues and organs, including bone, , , fat, and blood.
- • : A firm but flexible that cushions joints, shapes the nose and ears, and acts as a smooth surface where bones meet.
Use it now: Choose one decision option. Cite E1 and E3, then explain how the rule connects the evidence to your choice.
Go further, optional: The source links below are optional enrichment. Every fact required for today's local evidence decision appears in this lesson package.
The four primary types are , , muscle, and nervous. Each has a distinct structure and function.
Limit: E1 supplies context or an observation; it does not by itself establish the explanation.
All body structures are built from only four types arranged from cell to organism, so identifying which tissue is affected is often the first step in diagnosing where a disease actually begins.
Limit: E2 is a teaching statement or comparison and must be checked against the task evidence.
You can name the four types and an example of each.
Limit: E3 supports only the result or product criterion named here; it cannot justify a broader clinical or causal claim.
PLTW-HAP-2027-02-09 · Simulated classroom evidence scenario
Your role: anatomy and physiology consultant
Decision: Your team must decide what the evidence from types and body-organization model supports before submitting the notebook record named on the lesson page.
- • Keep the current design.
- • Revise the feature that misses a criterion.
- • Run one more fair test before choosing.
Response: State one choice, cite at least two evidence IDs, explain the rule that connects them, and add one limitation. Submit it as the notebook record.
Claim ceiling: The supplied lesson evidence can support an observation, pattern, classroom mechanism, or next-step decision about types and body-organization model. It cannot by itself prove causation, establish a real clinical diagnosis, or justify action outside this classroom task.
Reason for review: Your team must decide what the evidence from types and body-organization model supports before submitting the notebook record named on the lesson page.
Context: Every organ and system in the body is assembled from just four types arranged in a hierarchy from cell to organism, so knowing the four tissues lets you reason about any structure you meet later.
- • T1: Read the notes on the four primary tissues: , , muscle, and nervous.
- • T2: Match each type to one example location in the body.
- • T3: Build a model card or poster ordering the levels: cell, , organ, , organism.
- • T4: Add one example to each level of your model where it applies.
- • T5: Submit a photo of your body-organization model with labels.
- • E1: The four primary types are , , muscle, and nervous. Each has a distinct structure and function.
- • E2: All body structures are built from only four types arranged from cell to organism, so identifying which tissue is affected is often the first step in diagnosing where a disease actually begins.
- • E3: You can name the four types and an example of each.
Measurements: No patient measurement is supplied unless it appears explicitly in E1-E3 or F1. Do not invent a value.
Figure finding: Teaching diagram for types and body-organization model. Trace the labeled structure, movement, or system relationship that connects form to function. This is a teaching model, not patient or experimental data.
Uncertainty: This is a composite classroom scenario. Missing history, measurements, or confirmation tests remain unknown and limit the conclusion.
Students often think Students think each organ is made of its own one special (the heart is 'heart tissue,' the stomach is 'stomach tissue').. The trap: That is the trap: a single organ almost always layers several of the four types together, because the stomach needs tissue to line it, muscle tissue to squeeze, tissue to hold it, and nervous tissue to signal, so 'stomach tissue' is not a real category.
Levels of organization (smallest to largest), with a tissue example:
- Cell: a single muscle cell (muscle tissue).
- Tissue: the four primary types are epithelial, connective, muscle, and nervous.
- Organ: the heart, which combines muscle tissue (cardiac muscle), connective tissue (valves), epithelial tissue (lining), and nervous tissue (conduction system).
- Organ system: the cardiovascular system (heart and blood vessels working together).
- Organism: the whole human body.
Four tissue types with one example location each:
- Epithelial: skin surface and the lining of the gut.
- Connective: bone, blood, and tendons.
- Muscle: biceps, heart wall.
- Nervous: brain, spinal cord, nerves.
| Tissue type | Example location | Main job |
|---|---|---|
| Epithelial | Skin surface, gut lining | Covers and lines, protects |
| Connective | Bone, blood, tendon | Supports and connects |
| Muscle | Biceps, heart wall | Produces movement |
| Nervous | Brain, spinal cord | Carries signals |
This model shows the level of evidence and organization needed to complete: A model card or poster that orders the five levels of structural organization and attaches one example tissue to each level where it applies, naming all four primary tissue types.
- Date and label the entry.
- Record the procedure, observation, or design decision clearly.
- End with what the evidence means and the next step.
Keep the structure. Replace the question, facts, measurements, and evidence. Then recheck units, vocabulary, and whether the conclusion goes beyond the evidence.
Also due today: Submit a labeled photo of your completed model.
- CER:
- Claim, Evidence, Reasoning: make a claim, back it with evidence, explain your reasoning.
- SOP:
- Standard Operating Procedure, the exact steps to follow (especially in a lab).
- Tracker:
- Your PLTW progress log where you record completed evidence.
- myPLTW:
- The PLTW course site where you do the online activities. Find it in Clever with your Microsoft sign-in, right next to Schoology.
Tap the speaker to hear a term. Add two of these to your notebook glossary with a definition and an example in your own words.
Pick just 2 or 3 words from today and make them yours: write what each one means in your own words, name the context clue or evidence that helped, then give one example from what you actually did in Tissue types and body-organization model. Try your own words first; the glossary is there if you get stuck. This is voluntary and counts as extra credit, so keep it short.
Saved on this device. Show Mr. Mendoza or add these to your notebook glossary to claim the extra credit.
Hand-picked readings, videos, and interactives for this lesson, all free and from authoritative open organizations (NIH, CDC, OpenStax, Khan Academy, PhET, HHMI, and more).
A fillable, Cornell-style notebook for Unit 1: Road to Rehabilitation. Type your notes, cues, and summaries right in the PDF, or print it and write by hand. Each lesson page has a cue column, a notes column, and a summary box, plus dated lab-record pages you can turn in.
HBS Unit 1 notebook: Road to Rehabilitation Fillable PDFCornell notes + lab recordsOpenVetted readings and references for this unit. Use them to prepare, to catch up if you were absent, or to go deeper on today's target.
Check yourself · commit, then reveal▸
Claim ceiling for this check: The supplied lesson evidence can support an observation, pattern, classroom mechanism, or next-step decision about types and body-organization model. It cannot by itself prove causation, establish a real clinical diagnosis, or justify action outside this classroom task.
Your small intestine both squeezes food along and absorbs nutrients through its lining. Which tissue type does the squeezing and which does the absorbing?
Write an answer and pick a confidence to unlock the key.
Fast retrieval with instant answers, not the commit-then-reveal check above. Try each from memory first: write what you remember about the earlier units, then check yourself here.
Go further and get help▸
What today's skills lead to. These are real health-science careers this course builds toward. Tap one to see, on the US Department of Labor's O*NET site, what the job actually involves, what it pays, and how fast it is growing.
The that become most of the bone and of the face.
Goes with: The cells that build the face
The master switch: how a cell decides to become bone rather than something else.
Goes with: The master switch: how a cell chooses its fate
How a seam disappears: EMT and let palatal shelves fuse.
Goes with: When palatal shelves meet: the seam must disappear
Build the body-organization model from home using the virtual tour: order the five levels of organization and attach one tissue example to each, then submit a labeled photo or slide.
Learn.Genetics (Utah)Then submit your Notebook check. Turn this in at the drop folder with your district Microsoft sign-in, or hand it to Mr. Mendoza in class. Both count as submitted. Doing the activity in myPLTW does not.
Class still runs. Complete the online activity above (it's self-guided). Need the concept taught without a teacher? Use this authoritative explainer:
Khan Academy: Introduction to the Human Body- CompleteEvery required part of the artifact is present, nothing left blank.
- AccurateThe science and the data are correct and match the evidence.
- Scientific reasoningYou explain your claim with evidence and reasoning (CER), not just an answer.
- Professional communicationClear, organized, labeled, and written the way a clinician or scientist would.
- SubmittedTurned in the right way, on the class site or handed to Mr. Mendoza in class, and confirmed. Not in Schoology: that is where the report-card grade appears later.