Lab safety, myPLTW, and how to submit
Safety gate · before any work
- Always wear the assigned PPE before handling any material.
- Know where the eyewash, fire blanket, and SDS binder are before starting any lab.
- Report every spill or injury to the teacher immediately.
Do now
Pass a lab-safety check and sign the safety contract, tour the myPLTW web portal, and learn exactly how to submit each kind of work.
- Hand in
- Lab-safety check: signed safety contract, completed safety scavenger hunt, and a screenshot showing you logged in to myPLTW.
- Where
- Turn this in at the drop folder with your district Microsoft sign-in, or hand it to Mr. Mendoza in class. Both count as submitted. Doing the activity in myPLTW does not.
You get two school days for every day you were absent, so this deadline moves with you.
Before a nurse gives a medication or a tech runs a sample, they check specific things every single time. What must you be able to find and do in our room before you are allowed to touch lab materials?
Pass a lab- check and sign the safety contract, tour the myPLTW web portal, and learn exactly how to submit each kind of work.
- • You can name the PPE for a lab and find the information on an SDS.
- • You can log in to myPLTW and open your course.
- • You can explain how to submit each kind of work and what counts as evidence.
- If a chemical splashed in your eye right now, would you know where to go? Where?
- Name one piece of PPE and say what it protects.
- 1Icebreaker: Would You Rather, lab edition (goggles for a day or gloves for a week?).
- 2Learn lab : PPE, reading an SDS, and the SOP for handling, storing, and cleaning up.
- 3Lab- scavenger hunt: find the eyewash, the fire blanket, the SDS binder, and the PPE in our room.
- 4Read and sign the lab- contract (a copy goes home for a parent signature).
- 5Log in to the myPLTW web portal (classroom.pltw.org) and find your course, then review how to submit a notebook sample, an exit ticket, a lab write-up, and website work completed, and what counts as evidence.
What did this day actually feel like?
Lab safety, myPLTW, and how to submit
Safety first, and not as a formality. Personal protective equipment, the Safety Data Sheet, and finding the hazard and first aid sections on a real chemical before anyone touched anything. He calls it earning entry to the lab, and that framing works on me.
Then myPLTW logins and a practice submission, so the first real one is not also the first time I have used the system. The Maniken is already on the bench and we are not allowed to touch it yet.
Turned in: safety agreement and practice submission → Class Records
Fiction. There is no such student. The lessons, labs and dates are the real planned course; the student, the classmates and the conversations are invented.
The same day, drawn.
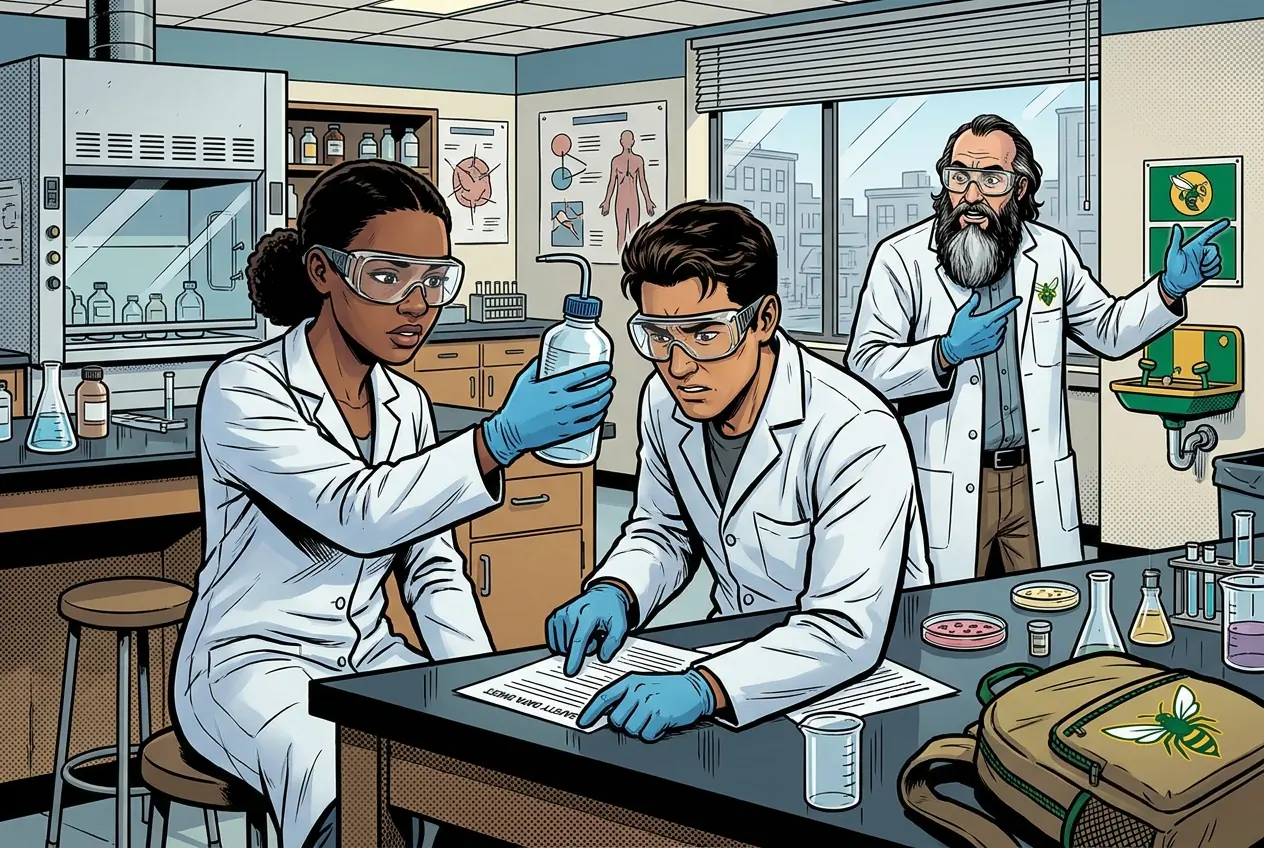
Safety, and not as a formality. Protective equipment, then finding the hazard and first aid sections on a real chemical before anyone touched anything.
Fiction. There is no such student. The lessons, labs and dates are the real planned course; the student, the classmates and the conversations are invented.
🛠 Get unstuck · pick your level
Lab day: Tier 1 is the whole class at the bench. No extension today.
🔑 Today's words · 5
Tap a word in the lesson for a plain meaning and one example. Recycled into next week's Do-Now.
A logical claim vs. an opinion
What makes a statement a claim you can defend, instead of just an opinion?
A claim is a statement that answers a question and can be supported or challenged with evidence. “This water sample is unsafe to drink” is a claim: we can test it. An opinion is a personal preference that does not have to be defended. “Tap water tastes better than bottled” is an opinion: it is true for you and that is fine.
Science runs on claims, not opinions. A good claim is specific (it says exactly what you think is true), it answers the actual question, and it is testable (there is some evidence that could prove it right or wrong).
The same sentence can hide either one. “Vaccines are good” is vague. “The MMR reduces measles cases in a community” is a claim, because we can go look at the data.
- • Specific: it states exactly what you think is true.
- • On-target: it answers the question that was asked.
- • Testable: some evidence could support it or prove it wrong.
- • Honest: you would change it if the evidence pointed the other way.
- • “Best / worst / prettiest” usually signals an opinion, not a claim.
- • If no possible evidence could change your mind, it is probably an opinion or a belief, not a scientific claim.
Write one claim and one opinion about a topic in this course. For your claim, name one piece of evidence that could prove it wrong.
Do the work · 80-minute blockfirst 5 min = hook▸
💡 Big idea: We earn lab privileges by proving we are safe, and we get credit by submitting clear evidence of our work.
- 0-6Icebreaker: Would You Rather, lab edition
- 6-25Lab : PPE, SDS, and the SOP
- 25-40Lab- scavenger hunt + sign the safety contract
- 40-65myPLTW portal tour + how to submit each artifact
- 65-80 check questions and close
- • Before we ever touch lab materials, we prove we know how to be safe.
- • You will sign a contract today, and a copy goes home for a parent signature.
- • Then we tour the PLTW portal and I show you exactly how to turn in every kind of work.
- • PPE protects you; an SDS lists handling, storage, and first-aid for a chemical.
- • myPLTW (classroom.pltw.org) is where the official course activities live.
- • Evidence = a myPLTW completion screenshot plus your notebook page and the matching submission.
Orientation: daily icebreakers, the daily lesson pages and website, what notes should look like (Cornell + the 6 Rs), the lab notebook, lab safety, the PLTW web portal, and a Friday WebXam pretest. · Lab , myPLTW, and how to submit
Day 4 of this lesson. Open this exact section in myPLTW (find it in Clever, Microsoft sign-in), then do the work below.
Do this: Set up your myPLTW (classroom.pltw.org) access and complete the course orientation checklist: routines, website, notebook, contract, and the .
Navigate the website and submit each kind of work with evidence.
Reach the day-4 checkpoint for this unit.
Orientation evidence due this week: completed website scavenger hunt, a notebook sample (first Cornell page), a signed contract with a myPLTW login screenshot, and the baseline WebXam pretest with a mastery goal.
The official PLTW activity stays inside myPLTW. If myPLTW will not open, use F1 and E1-E3 on this page to complete today's local evidence decision, then make up the official activity when access returns. Turn this in at the drop folder with your district Microsoft sign-in, or hand it to Mr. Mendoza in class. Both count as submitted. Doing the activity in myPLTW does not.
Check things off as you work, then submit. This tells Mr. Mendoza how you're doing so he can help the class. It does not replace turning in your producible through the submission route shown below.
Use the code Mr. Mendoza gave you, not your name. Saved on this device.
Orientation: daily icebreakers, the daily lesson pages and website, what notes should look like (Cornell + the 6 Rs), the lab notebook, lab safety, the PLTW web portal, and a Friday WebXam pretest. · Lab safety, myPLTW, and how to submit
Set up your myPLTW (classroom.pltw.org) access and complete the course orientation checklist: routines, website, notebook, contract, and the .
Reach the day-4 checkpoint for this unit.
This is how Mr. Mendoza sees the class keeping pace with PLTW. Be honest, it only helps if it is accurate.
🎯 Pass a lab- check and sign the safety contract, tour the myPLTW web portal, and learn exactly how to submit each kind of work.
- Icebreaker: Would You Rather, lab edition (goggles for a day or gloves for a week?).
- Learn lab : PPE, reading an SDS, and the SOP for handling, storing, and cleaning up.
- Lab- scavenger hunt: find the eyewash, the fire blanket, the SDS binder, and the PPE in our room.
- Read and sign the lab- contract (a copy goes home for a parent signature).
- Log in to the myPLTW web portal (classroom.pltw.org) and find your course, then review how to submit a notebook sample, an exit ticket, a lab write-up, and website work completed, and what counts as evidence.
Pre-lab: Lab- check: signed safety contract, completed safety scavenger hunt, and a screenshot showing you logged in to myPLTW.
Turn this in at the drop folder with your district Microsoft sign-in, or hand it to Mr. Mendoza in class. Both count as submitted. Doing the activity in myPLTW does not. Use the checklist just below and upload by 11:29 PM for full credit. Absent with an excused absence? You get two school days for every day you were absent, so this deadline moves with you.
| Task | Who |
|---|---|
| Icebreaker: Would You Rather, lab edition (goggles for a day or gloves for a week?). | _______ |
| Learn lab : PPE, reading an SDS, and the SOP for handling, storing, and cleaning up. | _______ |
| Lab- scavenger hunt: find the eyewash, the fire blanket, the SDS binder, and the PPE in our room. | _______ |
| Read and sign the lab- contract (a copy goes home for a parent signature). | _______ |
| Log in to the myPLTW web portal (classroom.pltw.org) and find your course, then review how to submit a notebook sample, an exit ticket, a lab write-up, and website work completed, and what counts as evidence. | _______ |
Working solo? Put your own name in "Who" for every row.
- You can name the PPE for a lab and find the information on an SDS.
- You can log in to myPLTW and open your course.
- You can explain how to submit each kind of work and what counts as evidence.
- 1Do thisPass a lab-safety check and sign the safety contract, tour the myPLTW web portal, and learn exactly how to submit each kind of work.
- 2Use this resource
- 3Submit thisPre-lab: Lab-safety check: signed safety contract, completed safety scavenger hunt, and a screenshot showing you logged in to myPLTW.
- 4Submit it here
- 1Open the drop folder.
- 2Sign in with your district Microsoft account, not a personal one.
- 3Upload the file, named Lastname_Firstname__Assignment Title.
- 4Your own upload panel says Uploaded with a green check: that is your receipt.
Turn this in at the drop folder with your district Microsoft sign-in, or hand it to Mr. Mendoza in class. Both count as submitted. Doing the activity in myPLTW does not. Human Anatomy & Physiology (Human Body Systems) › Orientation: daily icebreakers, the daily lesson pages and website, what notes should look like (Cornell + the 6 Rs), the lab notebook, lab safety, the PLTW web portal, and a Friday WebXam pretest. › Pre-labOpen the drop folder
Learn it · deck, reading, and vocabulary▸
The deck carries the prior idea forward, lets you inspect an analogy, maps the rule to biology, and ends with the same evidence decision and exit ticket used on this page.
Generated from this lesson's canonical data with a red-team citation check.
Notes are a process, not a page. The turn notes into a study tool you actually trust.
We earn lab privileges by proving we are safe, and we get credit by submitting clear evidence of our work.
A pilot uses a preflight checklist before the aircraft moves.
- Which checks happen before action?
- Which hazard does each check control?
- What happens if a familiar step is skipped?
A routine works when each action controls a named hazard before exposure begins.
A laboratory hazard can change during a procedure, so students must keep monitoring conditions after the checklist.
- • Preflight checks map to PPE and setup.
- • Aircraft hazards map to chemical, biological, heat, or sharps hazards.
- • Go or no-go maps to the pre-lab readiness decision.
Driving question: Before a nurse gives a medication or a tech runs a sample, they check specific things every single time. What must you be able to find and do in our room before you are allowed to touch lab materials?
What you already know: Notes are a process, not a page. The turn notes into a study tool you actually trust.
New idea: We earn lab privileges by proving we are safe, and we get credit by submitting clear evidence of our work.
Visual or model: F1. F1. A lesson illustration or teaching diagram for Lab safety, myPLTW, and how to submit. Use it with E1-E3; it is a model or context image, not experimental or patient data. What to notice: Trace the labeled structure, movement, or system relationship that connects form to function.
- Observe or measure the relevant feature in Lab , myPLTW, and how to submit.
- Organize the observation with a stable evidence ID.
- Apply this rule: A routine works when each action controls a named hazard before exposure begins.
- Choose the option the evidence supports and state the limit of the conclusion.
Real biomedical example: Before a nurse gives a medication or a tech runs a sample, they check specific things every single time. What must you be able to find and do in our room before you are allowed to touch lab materials?
What the evidence supports: E1-E3 and F1 support the daily take-home when the response meets the stated success criteria.
What it cannot prove: The package does not support claims beyond this lesson's or any real patient diagnosis.
- • procedure: A clear, ordered set of steps followed exactly the same way each time to carry out a task safely and get reliable results.
- • routine: A consistent set of steps done in the same order each time, which builds good habits and makes work more reliable and efficient.
- • PPE: Personal protective equipment, the gear like gloves, goggles, lab coats, and masks worn to shield the body from chemical, biological, or physical hazards.
- • SDS: A data sheet: a standardized document listing a chemical's hazards, safe handling steps, and emergency measures for anyone using it.
- • : A note-taking layout that splits a page into a wide notes column, a narrow cue column for questions, and a summary strip at the bottom.
- • : A six-step learning cycle (Record, Reduce, Review, Reflect, Recite, Revise) used to turn class notes into deep, lasting understanding.
- • mastery: Knowing a skill or concept well enough to use it confidently under pressure, not just recognizing it on a slide.
- • : An assessment given before instruction begins so you can measure how much was learned by comparing it to a later test on the same material.
Use it now: Choose one decision option. Cite E1 and E3, then explain how the rule connects the evidence to your choice.
Go further, optional: The source links below are optional enrichment. Every fact required for today's local evidence decision appears in this lesson package.
PPE protects you; an SDS lists handling, storage, and first-aid for a chemical.
Limit: E1 supplies context or an observation; it does not by itself establish the explanation.
We earn lab privileges by proving we are safe, and we get credit by submitting clear evidence of our work.
Limit: E2 is a teaching statement or comparison and must be checked against the task evidence.
You can name the PPE for a lab and find the information on an SDS.
Limit: E3 supports only the result or product criterion named here; it cannot justify a broader clinical or causal claim.
PLTW-HAP-2027-01-25 · Simulated classroom evidence scenario
Your role: anatomy and physiology consultant
Decision: Your team must decide what the evidence from Lab , myPLTW, and how to submit supports before submitting the pre-lab readiness record named on the lesson page.
- • Proceed because the readiness evidence is complete.
- • Pause and correct the named setup or gap.
- • Repeat the measurement because quality controls are not acceptable.
Response: State one choice, cite at least two evidence IDs, explain the rule that connects them, and add one limitation. Submit it as the pre-lab readiness record.
Claim ceiling: The supplied lesson evidence can support an observation, pattern, classroom mechanism, or next-step decision about Lab , myPLTW, and how to submit. It cannot by itself prove causation, establish a real clinical diagnosis, or justify action outside this classroom task.
Reason for review: Your team must decide what the evidence from Lab , myPLTW, and how to submit supports before submitting the pre-lab readiness record named on the lesson page.
Context: Lab privileges are earned by proving you can work safely, and credit is earned by submitting clear evidence, in this class as in a real clinical job.
- • T1: Icebreaker: Would You Rather, lab edition (goggles for a day or gloves for a week?).
- • T2: Learn lab : PPE, reading an SDS, and the SOP for handling, storing, and cleaning up.
- • T3: Lab- scavenger hunt: find the eyewash, the fire blanket, the SDS binder, and the PPE in our room.
- • T4: Read and sign the lab- contract (a copy goes home for a parent signature).
- • T5: Log in to the myPLTW web portal (classroom.pltw.org) and find your course, then review how to submit a notebook sample, an exit ticket, a lab write-up, and website work completed, and what counts as evidence.
- • E1: PPE protects you; an SDS lists handling, storage, and first-aid for a chemical.
- • E2: We earn lab privileges by proving we are safe, and we get credit by submitting clear evidence of our work.
- • E3: You can name the PPE for a lab and find the information on an SDS.
Measurements: No patient measurement is supplied unless it appears explicitly in E1-E3 or F1. Do not invent a value.
Figure finding: Teaching diagram for Lab , myPLTW, and how to submit. Trace the labeled structure, movement, or system relationship that connects form to function. This is a teaching model, not patient or experimental data.
Uncertainty: This is a composite classroom scenario. Missing history, measurements, or confirmation tests remain unknown and limit the conclusion.
Students often think rules are just a formality to sign and forget. The trap: the SDS and PPE are the exact tools that prevent real injuries, so you sign the contract because you will actually use them
Eyewash station: back left sink. Fire blanket: by the door. SDS binder: shelf under the fume hood.
From the SDS, the storage rule I recorded: store in a cool, ventilated cabinet away from acids.
PPE I will wear: goggles, gloves, and an apron.
This model shows the level of evidence and organization needed to complete: Completes the safety SOP check: the student locates safety equipment and reads the handling information on an SDS before any lab.
- Identify the purpose, hazards, and required controls.
- Write the procedure in a usable order.
- Confirm materials, measurements, and waste handling before starting.
Keep the structure. Replace the question, facts, measurements, and evidence. Then recheck units, vocabulary, and whether the conclusion goes beyond the evidence.
- CER:
- Claim, Evidence, Reasoning: make a claim, back it with evidence, explain your reasoning.
- SOP:
- Standard Operating Procedure, the exact steps to follow (especially in a lab).
- Tracker:
- Your PLTW progress log where you record completed evidence.
- myPLTW:
- The PLTW course site where you do the online activities. Find it in Clever with your Microsoft sign-in, right next to Schoology.
Tap the speaker to hear a term. Add two of these to your notebook glossary with a definition and an example in your own words.
Pick just 2 or 3 words from today and make them yours: write what each one means in your own words, name the context clue or evidence that helped, then give one example from what you actually did in Lab safety, myPLTW, and how to submit. Try your own words first; the glossary is there if you get stuck. This is voluntary and counts as extra credit, so keep it short.
Saved on this device. Show Mr. Mendoza or add these to your notebook glossary to claim the extra credit.
Vetted readings and references for this unit. Use them to prepare, to catch up if you were absent, or to go deeper on today's target.
May require a free account. Use the class copy if you cannot sign in.
Check yourself · commit, then reveal▸
Claim ceiling for this check: The supplied lesson evidence can support an observation, pattern, classroom mechanism, or next-step decision about Lab , myPLTW, and how to submit. It cannot by itself prove causation, establish a real clinical diagnosis, or justify action outside this classroom task.
What counts as evidence that you actually did today's work, and where does each piece get submitted?
Write an answer and pick a confidence to unlock the key.
Go further and get help▸
I can name the procedure's purpose and the evidence I will record. I can identify each named hazard and the control that reduces it: Always wear the assigned PPE before handling any material. My data table is ready before materials are handled.
Finish the checklist before you handle any material.
- • Always wear the assigned PPE before handling any material.
- • Know where the eyewash, fire blanket, and SDS binder are before starting any lab.
- • Report every spill or injury to the teacher immediately.
- 1Before materials are handled, identify the purpose, variables or comparison, controls, measurement units, and stop-work condition.
- 2Icebreaker: Would You Rather, lab edition (goggles for a day or gloves for a week?).
- 3Learn lab safety: PPE, reading an SDS, and the SOP for handling, storing, and cleaning up.
- 4Lab-safety scavenger hunt: find the eyewash, the fire blanket, the SDS binder, and the PPE in our room.
- 5Read and sign the lab-safety contract (a copy goes home for a parent signature).
- 6Log in to the myPLTW web portal (classroom.pltw.org) and find your course, then review how to submit a notebook sample, an exit ticket, a lab write-up, and website work completed, and what counts as evidence.
- 7Record each result in the prepared table before interpreting it. Mark missing, repeated, or invalid results truthfully.
- 8Complete the named cleanup and waste route, remove PPE safely, wash hands when required, and confirm the station is ready for the next group.
| Trial or sample ID | Independent condition | Measured result with units | Observation before interpretation | Quality-control note |
|---|---|---|---|---|
Before the procedure, predict the result and cite the rule behind the prediction.
After the procedure, compare the result with the prediction and name one limitation or source of uncertainty.
What today's skills lead to. These are real health-science careers this course builds toward. Tap one to see, on the US Department of Labor's O*NET site, what the job actually involves, what it pays, and how fast it is growing.
Today's work depends on equipment and locations in our lab, so it cannot be finished from home. Do the part that travels: read the target above and the safety notes, and write what you already know.
Back in class. The in-room part has to be done in the room. See Mr. Mendoza on your first day back and he will run it with you before you work at the bench.
Class still runs. Complete the online activity above (it's self-guided). Need the concept taught without a teacher? Use this authoritative explainer:
CDC Laboratory Safety- CompleteEvery required part of the artifact is present, nothing left blank.
- AccurateThe science and the data are correct and match the evidence.
- Scientific reasoningYou explain your claim with evidence and reasoning (CER), not just an answer.
- Professional communicationClear, organized, labeled, and written the way a clinician or scientist would.
- SubmittedTurned in the right way, on the class site or handed to Mr. Mendoza in class, and confirmed. Not in Schoology: that is where the report-card grade appears later.
- Error analysis and method · counts doubleName a specific limit of the method and how it moved your result, and compare what you predicted to what happened. "Human error" does not count; say what about the procedure or instrument caused it.