
Bioethics: imaging and privacy
Do now
Debate whether a patient's medical images and anatomy maps should be shared for teaching, then post a CER.
- Hand in
- One-paragraph CER on whether patient imaging data should be shared for teaching without renewed consent.
- Where
- Turn this in at the drop folder with your district Microsoft sign-in, or hand it to Mr. Mendoza in class. Both count as submitted. Doing the activity in myPLTW does not.
You get two school days for every day you were absent, so this deadline moves with you.
Should a Cleveland hospital be allowed to reuse a real patient's CT scan to teach students year after year without asking that patient again each time?
Debate whether a patient's medical images and maps should be shared for teaching, then post a CER.
- • You can state a claim about using patient images for teaching.
- • You can weigh a benefit against a privacy risk.
- Name one thing an X-ray or MRI can show about you that a stranger could use to figure out who you are.
- In one sentence, is a benefit to learners the same kind of thing as a harm to a patient, or are they different kinds of things you have to weigh?
- 1Read the prompt: should a hospital use real patient scans to teach students without re-asking permission each time?
- 2List two benefits to learners and two privacy risks to the patient.
- 3Choose a side and write a one-sentence claim with your reason.
- 4Debate in your John Carroll bioethics group and note the strongest opposing point.
- 5Post a CER response weighing teaching value against patient privacy.
What did this day actually feel like?
Bioethics: imaging and privacy
ETHICS DAY Should a hospital use real patient scans to teach students without asking permission again? The scan was taken for care. Teaching is a different purpose.
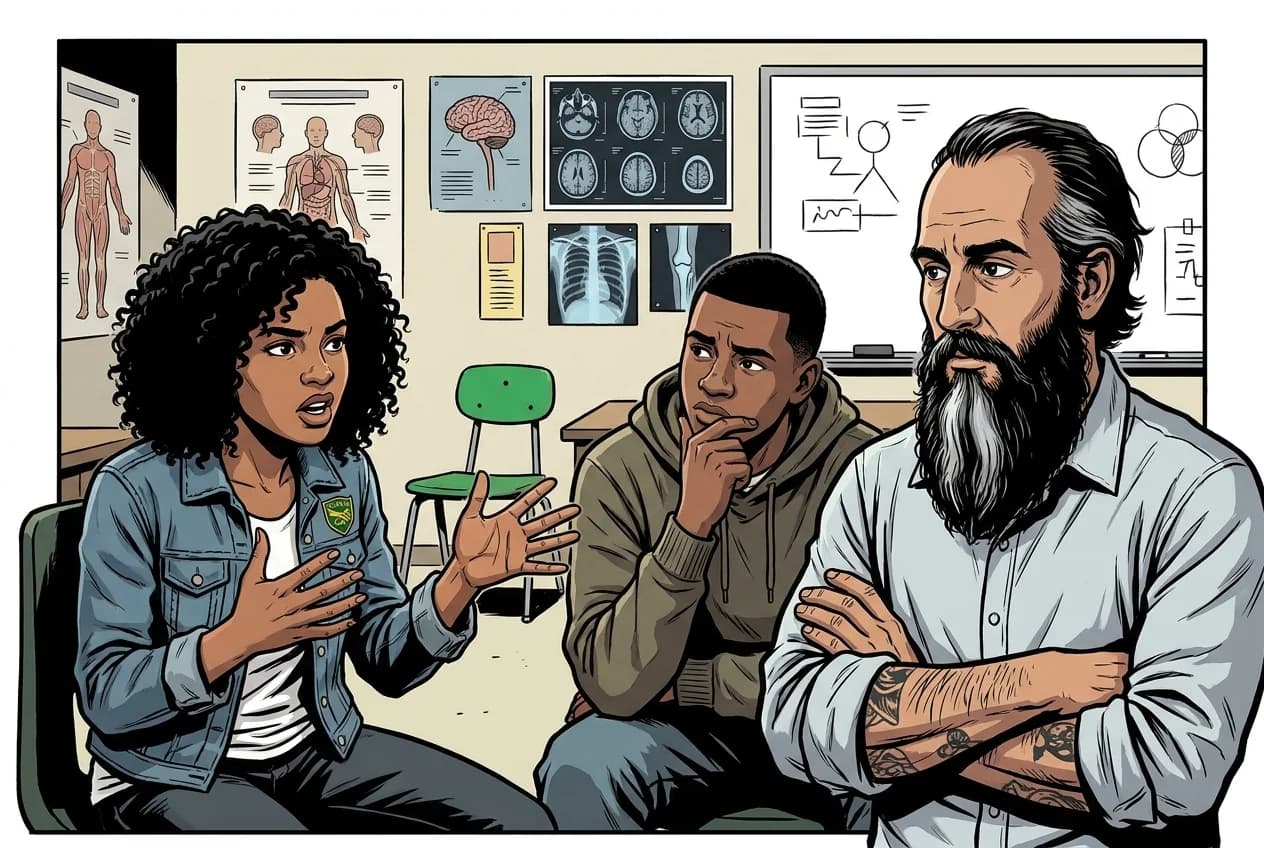
I argued yes, because the images are anonymized and the educational benefit is real. The pushback was that a scan can carry identifying information in ways people do not expect, and that anonymized is a claim someone has to actually verify. I still lean yes. I hold it less confidently than I did at the start of the period.
Turned in: CER → Claim Evidence Reasoning folder
Fiction. There is no such student. The lessons, labs and dates are the real planned course; the student, the classmates and the conversations are invented.
The same day, drawn.
Should a hospital use real patient scans to teach students without asking permission again? The scan was taken for care. Teaching is a different purpose.
Fiction. There is no such student. The lessons, labs and dates are the real planned course; the student, the classmates and the conversations are invented.
🛠 Get unstuck · pick your level
🔑 Today's words · 5
Tap a word in the lesson for a plain meaning and one example. Recycled into next week's Do-Now.
Do the work · 80-minute blockfirst 5 min = hook▸
💡 Big idea: Medical images can point back to one specific person, so using them to teach is always a trade between educational benefit and that person's right to privacy, never a purely technical decision.
- 0-5Intro: framing patient-image privacy question
- 5-20Independent reading and two-column benefit/risk list
- 20-40John Carroll bioethics group debate
- 40-55Draft one-sentence claim and select strongest evidence
- 55-75Write and post CER
- 75-80Whole-class share of strongest opposing arguments
- • This week we start building the skeletal and organizational framework of the body. But first, a question the field has not fully settled.
- • When a hospital takes your X-ray, who owns that image? You paid for the scan, but the hospital stores it. Can they show it to students?
- • This is not hypothetical. Teaching hospitals use patient images every day. Today you will decide whether that practice is ethical and build a CER to defend your position.
- • Your CER from today will be compared to your arguments later in the unit when we analyze actual imaging data.
- • Medical imaging (X-ray, MRI, CT) creates detailed anatomical records that can identify a patient.
- • HIPAA protects patient health information; de-identification is required before images are used without fresh consent.
- • Bioethical arguments must weigh concrete benefits against concrete harms rather than relying on feelings alone.
Unit 1.1 Beginning with Bones: Patient rehabilitation context, regional/directional terms, body cavities/planes, tissue structure. · Bioethics: imaging and privacy
Day 1 of this lesson. Open this exact section in myPLTW (find it in Clever, Microsoft sign-in), then do the work below.
Do this: Open Lesson 1.1 Beginning with Bones in myPLTW and complete the introductory task for this lesson week; use it to add a medical-imaging fact to your imaging-and-privacy CER.
Mark the introductory task complete in myPLTW after posting your CER.
You finished the course-launch week; this is the start of Lesson 1.1 -and-organization content, and the introductory task should be checked off today.
myPLTW completion status plus CER screenshot on class board.
The official PLTW activity stays inside myPLTW. If myPLTW will not open, use F1 and E1-E3 on this page to complete today's local evidence decision, then make up the official activity when access returns. Turn this in at the drop folder with your district Microsoft sign-in, or hand it to Mr. Mendoza in class. Both count as submitted. Doing the activity in myPLTW does not.
Check things off as you work, then submit. This tells Mr. Mendoza how you're doing so he can help the class. It does not replace turning in your producible through the submission route shown below.
Use the code Mr. Mendoza gave you, not your name. Saved on this device.
Unit 1.1 Beginning with Bones: Patient rehabilitation context, regional/directional terms, body cavities/planes, tissue structure. · Bioethics: imaging and privacy
Open Lesson 1.1 Beginning with Bones in myPLTW and complete the introductory task for this lesson week; use it to add a medical-imaging fact to your imaging-and-privacy CER.
You finished the course-launch week; this is the start of Lesson 1.1 -and-organization content, and the introductory task should be checked off today.
This is how Mr. Mendoza sees the class keeping pace with PLTW. Be honest, it only helps if it is accurate.
🎯 Debate whether a patient's medical images and maps should be shared for teaching, then post a CER.
- Read the prompt: should a hospital use real patient scans to teach students without re-asking permission each time?
- List two benefits to learners and two privacy risks to the patient.
- Choose a side and write a one-sentence claim with your reason.
- Debate in your John Carroll bioethics group and note the strongest opposing point.
- Post a CER response weighing teaching value against patient privacy.
CER: One-paragraph CER on whether patient imaging data should be shared for teaching without renewed consent.
Turn this in at the drop folder with your district Microsoft sign-in, or hand it to Mr. Mendoza in class. Both count as submitted. Doing the activity in myPLTW does not. Use the checklist just below and upload by 11:29 PM for full credit. Absent with an excused absence? You get two school days for every day you were absent, so this deadline moves with you.
| Task | Who |
|---|---|
| Read the prompt: should a hospital use real patient scans to teach students without re-asking permission each time? | _______ |
| List two benefits to learners and two privacy risks to the patient. | _______ |
| Choose a side and write a one-sentence claim with your reason. | _______ |
| Debate in your John Carroll bioethics group and note the strongest opposing point. | _______ |
| Post a CER response weighing teaching value against patient privacy. | _______ |
Working solo? Put your own name in "Who" for every row.
- You can state a claim about using patient images for teaching.
- You can weigh a benefit against a privacy risk.
- 1Do thisDebate whether a patient's medical images and anatomy maps should be shared for teaching, then post a CER.
- 2Use this resource
- 3Submit thisCER: One-paragraph CER on whether patient imaging data should be shared for teaching without renewed consent.
- 4Submit it here
- 1Open the drop folder.
- 2Sign in with your district Microsoft account, not a personal one.
- 3Upload the file, named Lastname_Firstname__Assignment Title.
- 4Your own upload panel says Uploaded with a green check: that is your receipt.
Turn this in at the drop folder with your district Microsoft sign-in, or hand it to Mr. Mendoza in class. Both count as submitted. Doing the activity in myPLTW does not. Human Anatomy & Physiology (Human Body Systems) › Unit 1.1 Beginning with Bones: Patient rehabilitation context, regional/directional terms, body cavities/planes, tissue structure. › CEROpen the drop folder
Learn it · deck, reading, and vocabulary▸
The deck carries the prior idea forward, lets you inspect an analogy, maps the rule to biology, and ends with the same evidence decision and exit ticket used on this page.
Generated from this lesson's canonical data with a red-team citation check.
Precise anatomical language eliminates ambiguity when locating structures, injuries, or pathology in the body.
Medical images can point back to one specific person, so using them to teach is always a trade between educational benefit and that person's right to privacy, never a purely technical decision.
A mechanic studies a tool whose shape allows one job but limits another.
- Which feature makes the tool work?
- What changes if that feature bends or breaks?
- Which observation shows function rather than appearance?
Structure creates possibilities and limits for function.
Living tissues adapt and interact with other systems; a metal tool does not.
- • Tool shape maps to .
- • The job maps to physiological function.
- • Damage maps to a predicted functional change.
Driving question: Should a Cleveland hospital be allowed to reuse a real patient's CT scan to teach students year after year without asking that patient again each time?
What you already know: Precise anatomical language eliminates ambiguity when locating structures, injuries, or pathology in the body.
New idea: Medical images can point back to one specific person, so using them to teach is always a trade between educational benefit and that person's right to privacy, never a purely technical decision.
Visual or model: F1. F1. A lesson illustration or teaching diagram for Bioethics: imaging and privacy. Use it with E1-E3; it is a model or context image, not experimental or patient data. What to notice: Trace the labeled structure, movement, or system relationship that connects form to function.
- Observe or measure the relevant feature in Bioethics: imaging and privacy.
- Organize the observation with a stable evidence ID.
- Apply this rule: Structure creates possibilities and limits for function.
- Choose the option the evidence supports and state the limit of the conclusion.
Real biomedical example: Should a Cleveland hospital be allowed to reuse a real patient's CT scan to teach students year after year without asking that patient again each time?
What the evidence supports: E1-E3 and F1 support the daily take-home when the response meets the stated success criteria.
What it cannot prove: The package does not support claims beyond this lesson's or any real patient diagnosis.
- • : Describing an anatomical plane or cut that divides the body into left and right parts, running front to back.
- • : An anatomical plane or direction at the front of the body, including the of the forehead and the plane dividing front from back.
- • : An anatomical plane that runs horizontally across the body, dividing it into upper and lower sections.
- • : A hollow space inside the body that holds and protects organs, such as the chest around the heart and lungs.
- • : A group of similar cells working together to perform a shared function, such as muscle, nerve, or .
- • : Relating to the sheets of tightly packed cells that line and cover body surfaces, organs, and cavities and form protective barriers.
- • : A type that supports, binds, and protects other tissues and organs, including bone, , , fat, and blood.
- • : A firm but flexible that cushions joints, shapes the nose and ears, and acts as a smooth surface where bones meet.
Use it now: Choose one decision option. Cite E1 and E3, then explain how the rule connects the evidence to your choice.
Go further, optional: The source links below are optional enrichment. Every fact required for today's local evidence decision appears in this lesson package.
Medical imaging (X-ray, MRI, CT) creates detailed anatomical records that can identify a patient.
Limit: E1 supplies context or an observation; it does not by itself establish the explanation.
Medical images can point back to one specific person, so using them to teach is always a trade between educational benefit and that person's right to privacy, never a purely technical decision.
Limit: E2 is a teaching statement or comparison and must be checked against the task evidence.
You can state a claim about using patient images for teaching.
Limit: E3 supports only the result or product criterion named here; it cannot justify a broader clinical or causal claim.
PLTW-HAP-2027-02-04 · Simulated classroom evidence scenario
Your role: anatomy and physiology consultant
Decision: Your team must decide what the evidence from Bioethics: imaging and privacy supports before submitting the claim-evidence-reasoning response named on the lesson page.
- • Select the option best supported by E1-E3.
- • Select a reasonable alternative and name the evidence it would require.
- • Delay the claim because the evidence does not distinguish the options.
Response: State one choice, cite at least two evidence IDs, explain the rule that connects them, and add one limitation. Submit it as the claim-evidence-reasoning response.
Claim ceiling: The supplied lesson evidence can support an observation, pattern, classroom mechanism, or next-step decision about Bioethics: imaging and privacy. It cannot by itself prove causation, establish a real clinical diagnosis, or justify action outside this classroom task.
Reason for review: Your team must decide what the evidence from Bioethics: imaging and privacy supports before submitting the claim-evidence-reasoning response named on the lesson page.
Context: A medical image is not just a picture of bones and organs; it is a record that can point back to one specific human, so every use of it is an ethical choice, not just a technical one.
- • T1: Read the prompt: should a hospital use real patient scans to teach students without re-asking permission each time?
- • T2: List two benefits to learners and two privacy risks to the patient.
- • T3: Choose a side and write a one-sentence claim with your reason.
- • T4: Debate in your John Carroll bioethics group and note the strongest opposing point.
- • T5: Post a CER response weighing teaching value against patient privacy.
- • E1: Medical imaging (X-ray, MRI, CT) creates detailed anatomical records that can identify a patient.
- • E2: Medical images can point back to one specific person, so using them to teach is always a trade between educational benefit and that person's right to privacy, never a purely technical decision.
- • E3: You can state a claim about using patient images for teaching.
Measurements: Use only the measurements, units, graph, or counts supplied in today's task. No additional patient measurement is implied.
Figure finding: Teaching diagram for Bioethics: imaging and privacy. Trace the labeled structure, movement, or system relationship that connects form to function. This is a teaching model, not patient or experimental data.
Uncertainty: This is a composite classroom scenario. Missing history, measurements, or confirmation tests remain unknown and limit the conclusion.
Mean = sum of values / number of values. Median = middle ordered value. Range = maximum - minimum.
For 2, 4, 4, and 10: mean = 20 / 4 = 5, median = 4, and range = 10 - 2 = 8.
Mean, median, and range keep the measurement unit. Order the values before finding the median.
Calculate the requested summary for today's supplied values, then write what it reveals and what it hides.
Students often think Students assume that if you remove the patient's name from a scan, it is now anonymous and free to use however you want.. The trap: That is the trap: de-identification means more than deleting a name, because unique (an implant, a healed break, a skull shape) can re-identify a person the same way a fingerprint does, so a name-free scan can still be protected health information under HIPAA.
Claim: A state should register drivers as organ donors using an opt-out system, but only if it clearly informs every driver and makes opting out quick and free.\nEvidence: The waiting list for organ transplants is far longer than the number of donated organs available each year, and many people die waiting. Countries that use opt-out or presumed-consent systems, such as Spain, tend to have higher donation rates than countries that require people to opt in. At the same time, an organ is part of a person's body, and taking it without genuine consent would violate that person's autonomy.\nReasoning: A good bioethical argument weighs a concrete benefit against a concrete harm. The benefit here is real and large: more available organs means more lives saved. The harm to guard against is loss of autonomy, meaning a person could become a donor without truly agreeing. Requiring clear information and an easy, free way to opt out protects autonomy while still capturing the many people who support donation but never get around to signing up. That keeps most of the life-saving benefit and removes most of the autonomy risk, which is exactly the balance a bioethical claim should strike.\nCounter-argument I heard and my response: A classmate said only a strict opt-in system fully respects autonomy, because silence is not the same as a yes. That is a fair point, and it is why the opt-out must be paired with clear notice and an easy exit. If people are truly informed and can leave the registry in seconds, then staying in it is a meaningful choice, not just silence.
This model shows the level of evidence and organization needed to complete: A short claim-evidence-reasoning post that weighs a societal medical benefit against individual autonomy, modeled on a parallel bioethics case so students can copy the CER structure without copying today's answer.
- Write one defensible claim.
- Choose specific evidence that supports the claim.
- Explain the scientific rule that connects the evidence to the claim.
Keep the structure. Replace the question, facts, measurements, and evidence. Then recheck units, vocabulary, and whether the conclusion goes beyond the evidence.
Also due today: Post to the class board and screenshot for your evidence packet.
- CER:
- Claim, Evidence, Reasoning: make a claim, back it with evidence, explain your reasoning.
- SOP:
- Standard Operating Procedure, the exact steps to follow (especially in a lab).
- Tracker:
- Your PLTW progress log where you record completed evidence.
- myPLTW:
- The PLTW course site where you do the online activities. Find it in Clever with your Microsoft sign-in, right next to Schoology.
Tap the speaker to hear a term. Add two of these to your notebook glossary with a definition and an example in your own words.
Pick just 2 or 3 words from today and make them yours: write what each one means in your own words, name the context clue or evidence that helped, then give one example from what you actually did in Bioethics: imaging and privacy. Try your own words first; the glossary is there if you get stuck. This is voluntary and counts as extra credit, so keep it short.
Saved on this device. Show Mr. Mendoza or add these to your notebook glossary to claim the extra credit.
Hand-picked readings, videos, and interactives for this lesson, all free and from authoritative open organizations (NIH, CDC, OpenStax, Khan Academy, PhET, HHMI, and more).
A fillable, Cornell-style notebook for Unit 1: Road to Rehabilitation. Type your notes, cues, and summaries right in the PDF, or print it and write by hand. Each lesson page has a cue column, a notes column, and a summary box, plus dated lab-record pages you can turn in.
HBS Unit 1 notebook: Road to Rehabilitation Fillable PDFCornell notes + lab recordsOpenVetted readings and references for this unit. Use them to prepare, to catch up if you were absent, or to go deeper on today's target.
Check yourself · commit, then reveal▸
Claim ceiling for this check: The supplied lesson evidence can support an observation, pattern, classroom mechanism, or next-step decision about Bioethics: imaging and privacy. It cannot by itself prove causation, establish a real clinical diagnosis, or justify action outside this classroom task.
A teacher shows a knee MRI with the patient's name blacked out. A student says 'that's fully anonymous now, use it freely.' Is the student right? Explain in one sentence.
Write an answer and pick a confidence to unlock the key.
Fast retrieval with instant answers, not the commit-then-reveal check above. Try each from memory first: write what you remember about the earlier units, then check yourself here.
Go further and get help▸
What today's skills lead to. These are real health-science careers this course builds toward. Tap one to see, on the US Department of Labor's O*NET site, what the job actually involves, what it pays, and how fast it is growing.
The that become most of the bone and of the face.
Goes with: The cells that build the face
The master switch: how a cell decides to become bone rather than something else.
Goes with: The master switch: how a cell chooses its fate
How a seam disappears: EMT and let palatal shelves fuse.
Goes with: When palatal shelves meet: the seam must disappear
Read the linked overview on medical imaging, then post a written CER on whether patient scans should be reused for teaching, citing one fact from the resource.
MedlinePlus: X-raysThen submit your CER. Turn this in at the drop folder with your district Microsoft sign-in, or hand it to Mr. Mendoza in class. Both count as submitted. Doing the activity in myPLTW does not.
Class still runs. Complete the online activity above (it's self-guided). Need the concept taught without a teacher? Use this authoritative explainer:
Khan Academy: Introduction to the Human Body- CompleteEvery required part of the artifact is present, nothing left blank.
- AccurateThe science and the data are correct and match the evidence.
- Scientific reasoningYou explain your claim with evidence and reasoning (CER), not just an answer.
- Professional communicationClear, organized, labeled, and written the way a clinician or scientist would.
- SubmittedTurned in the right way, on the class site or handed to Mr. Mendoza in class, and confirmed. Not in Schoology: that is where the report-card grade appears later.