
This class runs in two periods and they do not do the same lesson on the same day. You are reading the Period 6A-7B calendar, the one with John Carroll bioethics on Mondays.

Vital signs practical
Safety gate · before any work
- Sanitize thermometer probes with alcohol wipes between every student; do not share uncleaned thermometers.
- Sanitize stethoscope ear pieces with alcohol wipes before each use; allow 30 seconds to dry before inserting.
- Blood pressure cuffs should not be inflated above 180 mmHg; release pressure immediately if a partner reports discomfort or numbness.
Do now
Collect vital signs following an SOP and record them accurately in a simulated EMR.
- Hand in
- Simulated EMR record: all four vital signs with values, units, and normal range noted; one repeat measurement with both values compared; one limitation and one error source per technique.
- Where
- Submit this on the class form named on this page. The form requires the student's district Microsoft sign-in. The thank-you page is the submission receipt. A physical handoff counts only when the day page names that route. Doing the activity in myPLTW does not count as submitted.
You get two school days for every day you were absent, so this deadline moves with you.
If the form offers you a saved draft, choose New draft. If the Assignment box comes up empty, type it exactly: Vital signs practical
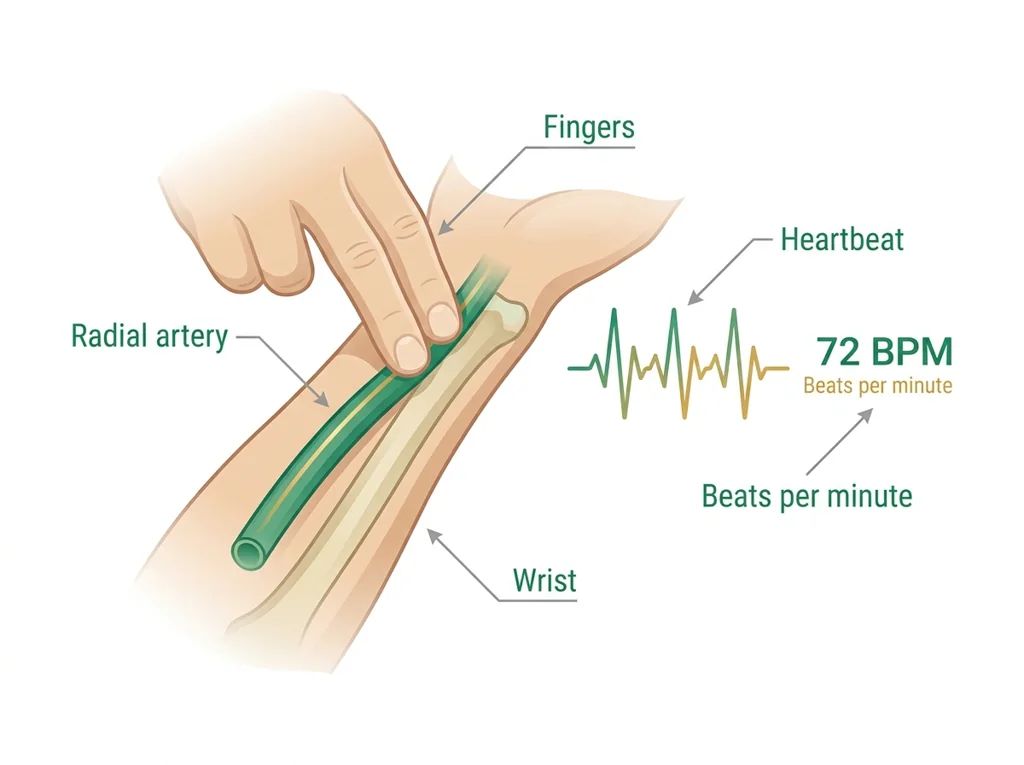
Two students measure the same partner's . One uses two fingers on the radial ; the other uses a thumb. They get different numbers. Which one is wrong, and why?
Collect vital signs following an SOP and record them accurately in a simulated EMR.
- • I can collect vital signs following an SOP.
- • I can record readings with correct units in an EMR.
- Put two fingers on your own wrist and find your . Where exactly is it?
- Why do you think a nurse counts your breathing without telling you they are doing it?
- 1Read the vital-signs SOP and gather the measurement tools.
- 2Measure , , temperature, and on a partner.
- 3Record each reading with correct units in the simulated EMR.
- 4Repeat one measurement to check precision and note any difference.
- 5Record one limitation and one error source for each technique.
What did this day actually feel like?
Vital signs practical
LAB Measuring on a real person for the first time, which is different from measuring a sample. My partner is a person who could tell I was nervous, and that changed his pulse, which is itself a measurement error worth noting.
Blood pressure was hard. I could not hear the sounds through the stethoscope on my first two tries and had to have it demonstrated twice. Getting the cuff position right and the deflation rate slow enough takes practice I did not have. I got a reading on the third attempt and recorded both the failed attempt and the successful one, because the SOP says document what happened, not what you wish had happened.
Then everything went into a simulated electronic medical record with correct units.
Turned in: simulated EMR record → Data Tables folder
Fiction. There is no such student. The lessons, labs and dates are the real planned course; the student, the classmates and the conversations are invented.
The same day, drawn.
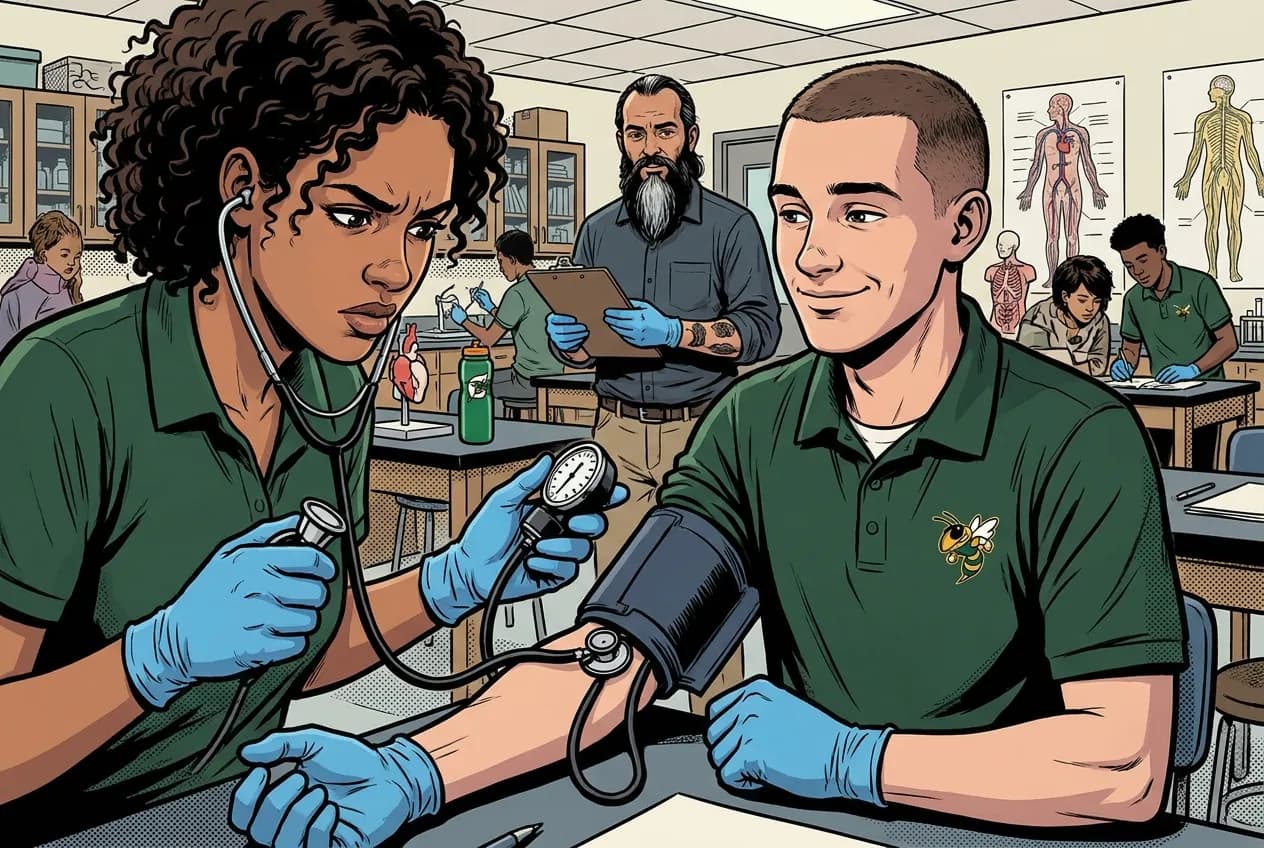
Measuring on a person is different from measuring a sample. He could tell I was nervous, and that changed his pulse, which is itself an error worth noting.
Fiction. There is no such student. The lessons, labs and dates are the real planned course; the student, the classmates and the conversations are invented.
🛠 Get unstuck · pick your level
Lab day: Tier 1 is the whole class at the bench. No extension today.
🔑 Today's words · 5
Tap a word in the lesson for a plain meaning and one example. Recycled into next week's Do-Now.
🧭 Everything on this day
Check you have the right sheet: the top of it prints today's portal day, Vital signs practical. The PLTW activity itself is in myPLTW and is not posted here.
Do the work · 80-minute blockfirst 5 min = hook▸
💡 Big idea: Accurate documentation depends on SOP-correct technique, so that a single measurement error does not become a permanent chart value that drives the wrong treatment.
- 0:00Demonstrate vital-sign technique for each of the four measures; class observes correct hand placement and timer use
- 0:15Partner practice: collect all four vital signs following the SOP; record each in the simulated EMR template
- 0:45Repeat one measurement; record both values; note the difference and whether it is within acceptable range
- 1:00Record one limitation and one technique-based error source for each measurement in the notebook
- 1:10Review a few EMR entries as a class; identify common documentation errors; preview Thursday analysis
- • Today you are the clinician. Your partner is the patient. Every reading you take goes into a simulated EMR exactly as a real nurse or medical assistant would document it.
- • Three technique rules that cannot be skipped: use two fingers not your thumb for , count respirations without telling your partner so they breathe naturally, and make sure the cuff is the right size.
- • After you take a reading once, you are going to take it again and compare. That comparison tells you your precision. If two readings of the same differ by more than the expected range, something went wrong in the technique.
- • Everything goes in the EMR with units. 72 bpm is not the same as 72. The unit is part of the data.
- • is measured by palpating the radial with two fingers for 60 seconds (or 30 seconds x 2); the thumb has its own pulse and must not be used.
- • rate is counted for 30-60 seconds without telling the patient, because awareness of breathing changes its rate.
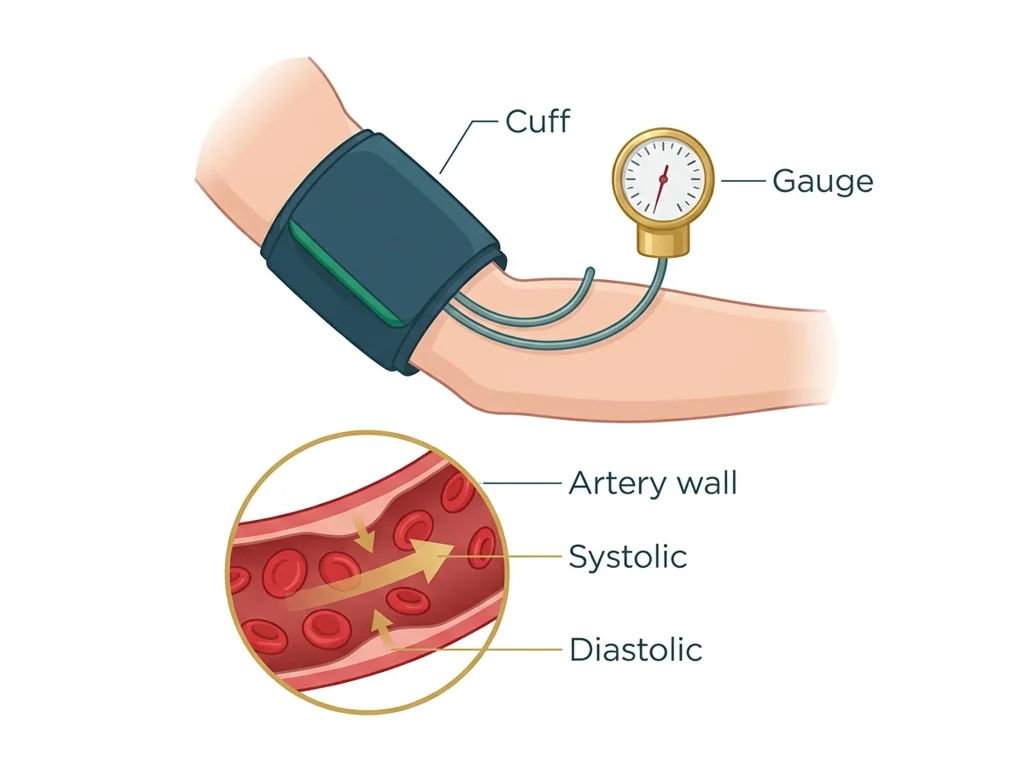
- • cuff size matters: an incorrectly sized cuff produces inaccurate readings; the bladder should encircle at least 80% of the upper arm.
Unit 2.1 Talk to Your Doc: Clinical communication, patient history, privacy, vital signs, homeostasis, EMR thinking. · Vital signs practical
Day 2 of this lesson. Open this exact section in myPLTW (find it in Clever, Microsoft sign-in), then do the work below.
Do this: In myPLTW, open Lesson 2.1 Talk to Your Doc and go to Activity 2.1.2 Vital Signs. Record your readings there as you take them.
Mark Activity 2.1.2 Vital Signs started in myPLTW.
You prepared your measurement plan Tuesday. Today all four vital signs should be measured, recorded with units in the simulated EMR, and repeated once before class ends.
Completed simulated EMR entry (all four vital signs with units) submitted through the tracker.
The official PLTW activity stays inside myPLTW. If myPLTW will not open, use F1 and E1-E3 on this page to complete today's local evidence decision, then make up the official activity when access returns. Submit this on the class form named on this page. The form requires the student's district Microsoft sign-in. The thank-you page is the submission receipt. A physical handoff counts only when the day page names that route. Doing the activity in myPLTW does not count as submitted.
Check things off as you work, then submit. This tells Mr. Mendoza how you're doing so he can help the class. It does not replace turning in your producible through the submission route shown below.
Use the code Mr. Mendoza gave you, not your name. Saved on this device.
Unit 2.1 Talk to Your Doc: Clinical communication, patient history, privacy, vital signs, homeostasis, EMR thinking. · Vital signs practical
In myPLTW, open Lesson 2.1 Talk to Your Doc and go to Activity 2.1.2 Vital Signs. Record your readings there as you take them.
You prepared your measurement plan Tuesday. Today all four vital signs should be measured, recorded with units in the simulated EMR, and repeated once before class ends.
This is how Mr. Mendoza sees the class keeping pace with PLTW. Be honest, it only helps if it is accurate.
🎯 Collect vital signs following an SOP and record them accurately in a simulated EMR.
- Read the vital-signs SOP and gather the measurement tools.
- Measure , , temperature, and on a partner.
- Record each reading with correct units in the simulated EMR.
- Repeat one measurement to check precision and note any difference.
- Record one limitation and one error source for each technique.
Data table: Simulated EMR record: all four vital signs with values, units, and noted; one repeat measurement with both values compared; one limitation and one error source per technique.
Submit this on the class form named on this page. The form requires the student's district Microsoft sign-in. The thank-you page is the submission receipt. A physical handoff counts only when the day page names that route. Doing the activity in myPLTW does not count as submitted. Use the checklist just below and upload by 11:29 PM for full credit. Absent with an excused absence? You get two school days for every day you were absent, so this deadline moves with you.
| Task | Who |
|---|---|
| Read the vital-signs SOP and gather the measurement tools. | _______ |
| Measure , , temperature, and on a partner. | _______ |
| Record each reading with correct units in the simulated EMR. | _______ |
| Repeat one measurement to check precision and note any difference. | _______ |
| Record one limitation and one error source for each technique. | _______ |
Working solo? Put your own name in "Who" for every row.
- I can collect vital signs following an SOP.
- I can record readings with correct units in an EMR.
- 1Do thisCollect vital signs following an SOP and record them accurately in a simulated EMR.
- 2Use this resource
- 3Submit thisData table: Simulated EMR record: all four vital signs with values, units, and normal range noted; one repeat measurement with both values compared; one limitation and one error source per technique.
- 4Submit it here
- 1Open the form. It must say For students at the top: if it says For parents and guardians, press Back and pick I am the student.
- 2If it offers you a saved draft, choose New draft: an old draft brings back the old assignment.
- 3Sign in with your district Microsoft account, not a personal one.
- 4Check the Assignment box says today's assignment from this page, then pick your period and type your student ID, all nine digits.
- 5Attach your file and press Submit. The thank-you page is your receipt.
Submit this on the class form named on this page. The form requires the student's district Microsoft sign-in. The thank-you page is the submission receipt. A physical handoff counts only when the day page names that route. Doing the activity in myPLTW does not count as submitted. Principles of Biomedical Technology (Principles of Biomedical Science) › Unit 2.1 Talk to Your Doc: Clinical communication, patient history, privacy, vital signs, homeostasis, EMR thinking. › Data tableTurn it in
Learn it · deck, reading, and vocabulary▸
The deck carries the prior idea forward, lets you inspect an analogy, maps the rule to biology, and ends with the same evidence decision and exit ticket used on this page.
Generated from this lesson's canonical data with a red-team citation check.
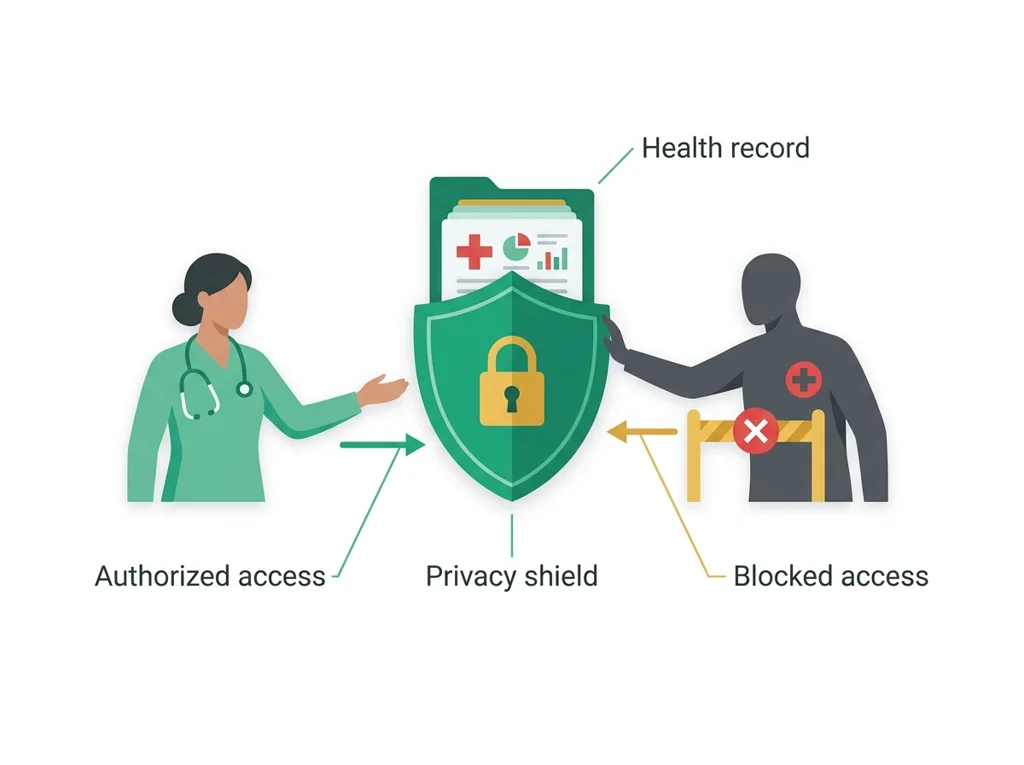
HIPAA protects individual medical privacy by default, but public-health law overrides it for specific reportable conditions, so that a silent outbreak cannot endanger the whole community.
Accurate documentation depends on SOP-correct technique, so that a single measurement error does not become a permanent chart value that drives the wrong treatment.
A research team lays out its question, variables, controls, sampling plan, measurement record, and analysis before deciding what the data support.
- Which variable is changed or compared?
- Which conditions and measurements must stay consistent?
- Which conclusion is inside the study's evidence boundary?
Define variables, controls, sampling, units, and the analysis plan before interpreting a result; analysis cannot repair biased or inconsistent measurement.
A well-organized classroom study can still be limited by , measurement quality, confounding, and the population represented.
- • Question and variable cards map to the study design.
- • Control and measurement cards map to fair, reproducible data collection.
- • The conclusion card maps to a bounded claim supported by the analysis.
Driving question: Two students measure the same partner's . One uses two fingers on the radial ; the other uses a thumb. They get different numbers. Which one is wrong, and why?
What you already know: HIPAA protects individual medical privacy by default, but public-health law overrides it for specific reportable conditions, so that a silent outbreak cannot endanger the whole community.
New idea: Accurate documentation depends on SOP-correct technique, so that a single measurement error does not become a permanent chart value that drives the wrong treatment.
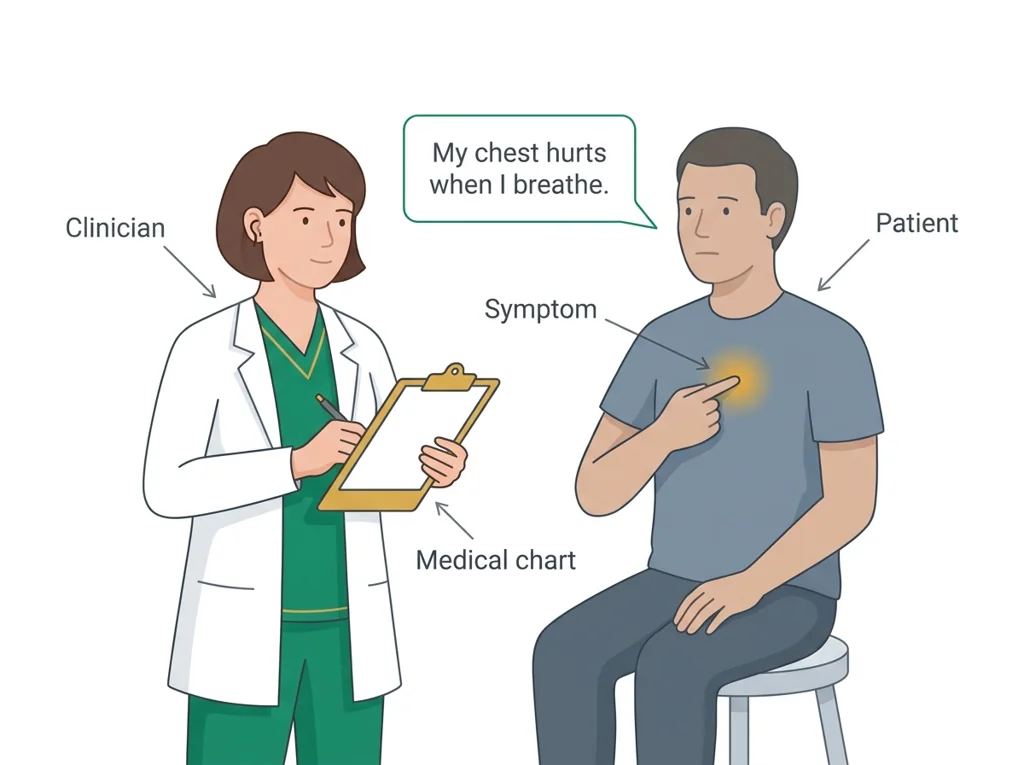
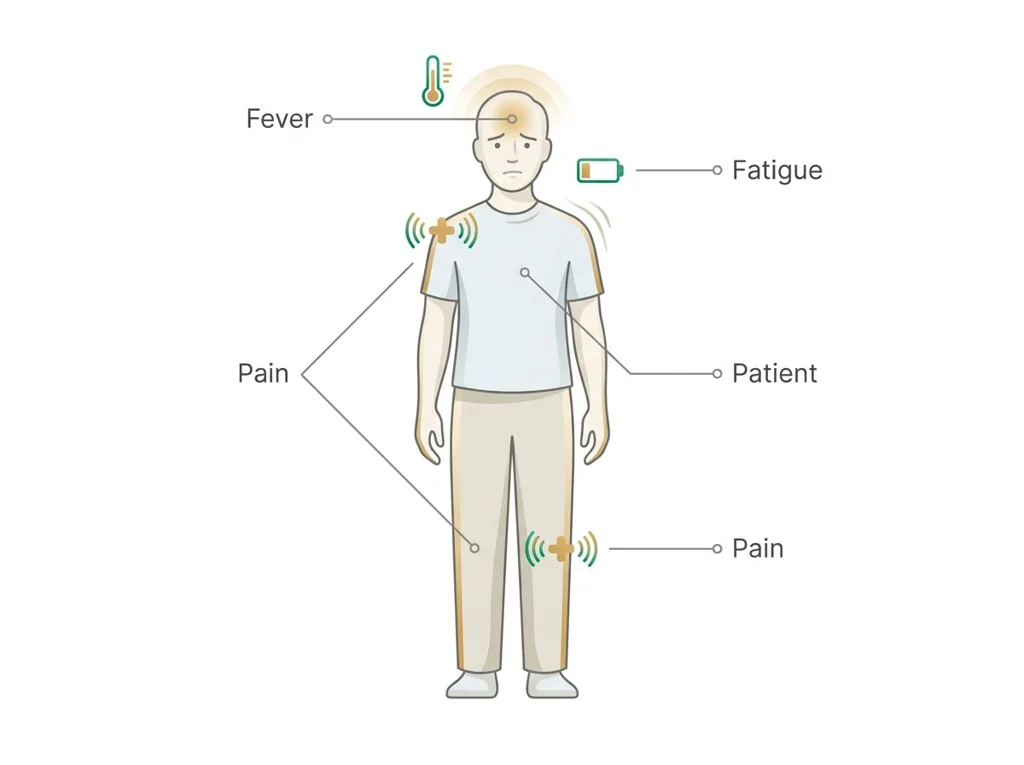
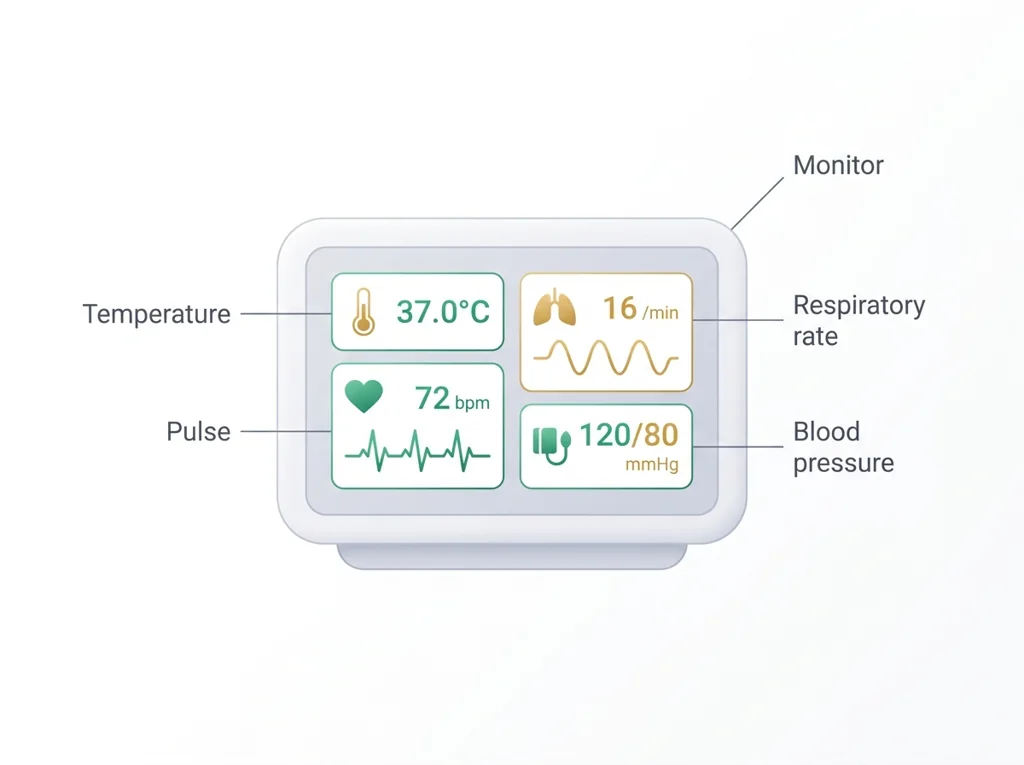
Visual or model: F1. F1. A lesson illustration or teaching diagram for Vital signs practical. Use it with E1-E3; it is a model or context image, not experimental or patient data. What to notice: Use the labels and arrows in F1 to identify the relationship that supports Vital signs practical.
- Observe or measure the relevant feature in vital signs practical.
- Organize the observation with a stable evidence ID.
- Apply this rule: Define variables, controls, sampling, units, and the analysis plan before interpreting a result; analysis cannot repair biased or inconsistent measurement.
- Choose the option the evidence supports and state the limit of the conclusion.
Real biomedical example: Two students measure the same partner's . One uses two fingers on the radial ; the other uses a thumb. They get different numbers. Which one is wrong, and why?
What the evidence supports: E1-E3 and F1 support the daily take-home when the response meets the stated success criteria.
What it cannot prove: The package does not support claims beyond this lesson's or any real patient diagnosis.
- • : The main symptom or reason, stated in the patient's own words, that brings a person to seek medical care.
- • symptom: A sign of illness that a patient feels or notices, such as pain, fever, or fatigue, which helps point toward a diagnosis.
- • : A basic measurement of body function, such as temperature, , breathing rate, and , used to assess a patient's health.
- • : The rhythmic expansion of an you can feel as the heart pumps blood, used to measure how many times the heart beats per minute.
- • : The force of blood pushing against walls, written as systolic over diastolic, with a normal adult reading below 120 over 80 mmHg.
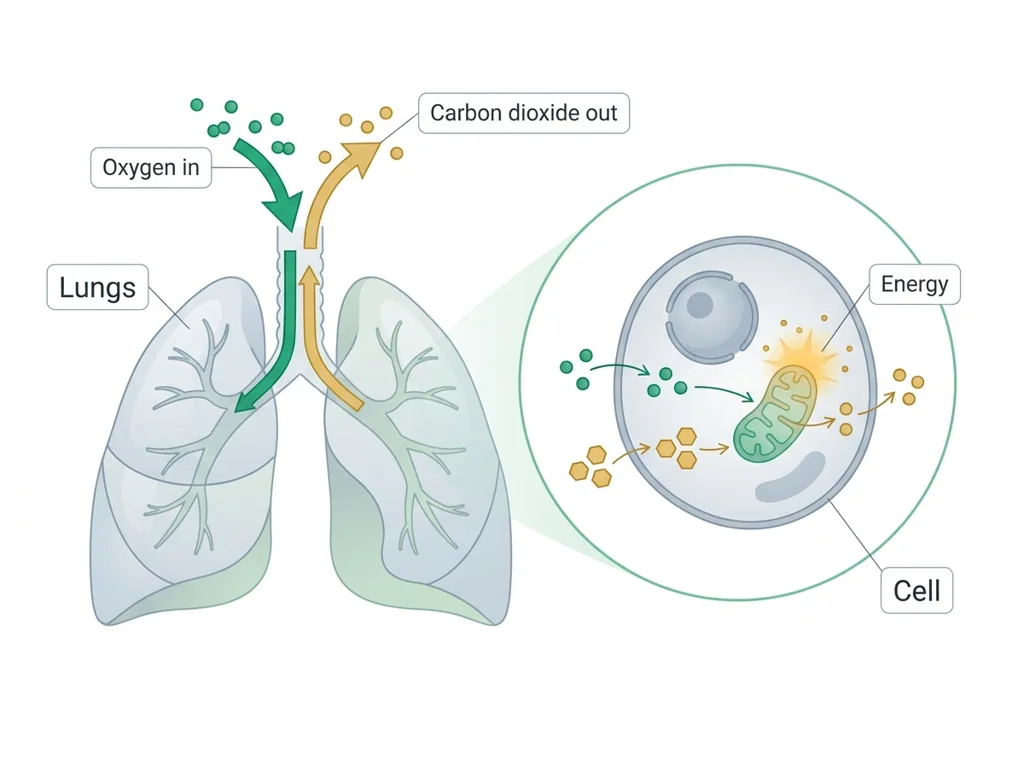
- • : The exchange of oxygen and carbon dioxide between the body and air, and the cellular process that uses oxygen to release energy from nutrients.
- • HIPAA: A U.S. law that protects the privacy and security of patients' health information and limits who may see or share it.
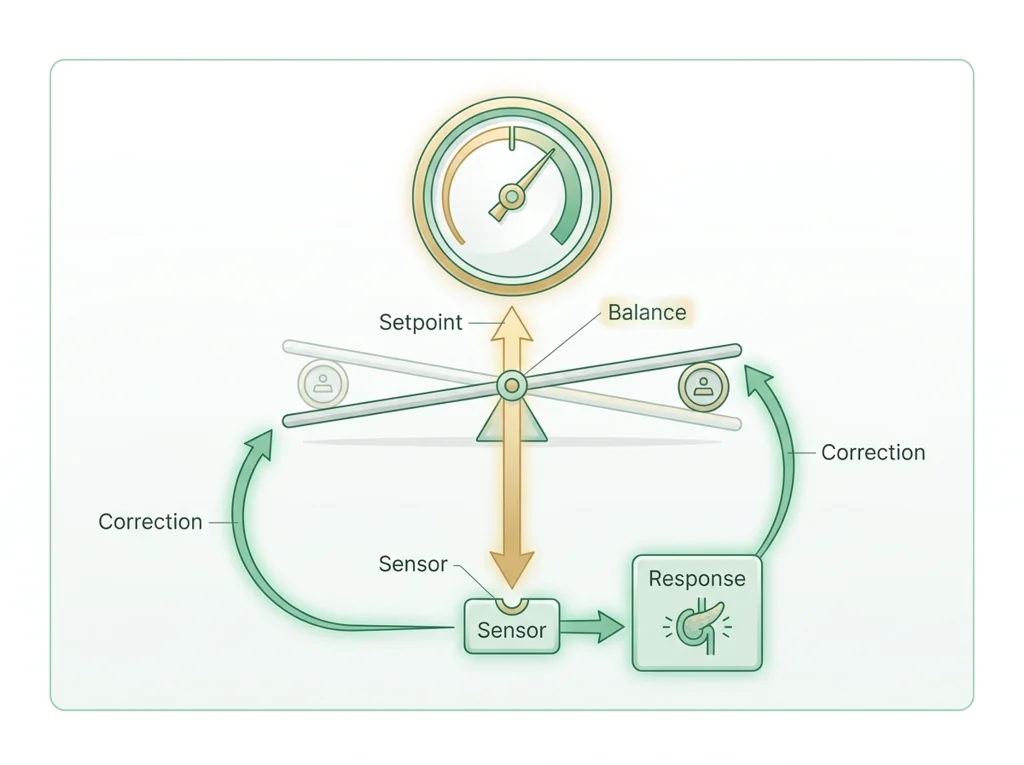
- • : The body's ongoing process of keeping internal conditions like temperature, blood sugar, and pH steady despite changes in the outside environment.
Use it now: Choose one decision option. Cite E1 and E3, then explain how the rule connects the evidence to your choice.
Go further, optional: The source links below are optional enrichment. Every fact required for today's local evidence decision appears in this lesson package.
Cardiovascular structure, pressure, electrical activity, and blood flow are related, so measurements must be interpreted in the context of the system and the limits of the instrument.
Limit: A classroom tracing, model, , or single measurement cannot diagnose a cardiovascular condition.
Define variables, controls, sampling, units, and the analysis plan before interpreting a result; analysis cannot repair biased or inconsistent measurement.
Limit: A well-organized classroom study can still be limited by , measurement quality, confounding, and the population represented.
You can collect vital signs following an SOP.
Limit: E3 defines the classroom product or success criterion. It is not independent scientific evidence and cannot justify a clinical or causal claim.
PLTW-PBT@P67-2026-10-07 · Simulated classroom evidence scenario
Your role: biomedical team member
Decision: Your team must decide what the evidence from vital signs practical supports before submitting the labeled and result claim named on the lesson page.
- • Select the option best supported by E1-E3.
- • Select a reasonable alternative and name the evidence it would require.
- • Delay the claim because the evidence does not distinguish the options.
Response: State one choice, cite at least two evidence IDs, explain the rule that connects them, and add one limitation. Submit it as the labeled and result claim.
Claim ceiling: Today's evidence supports a classroom claim about vital signs practical. It cannot prove causation, diagnose a real patient, or justify action outside this room.
Reason for review: Your team must decide what the evidence from vital signs practical supports before submitting the labeled and result claim named on the lesson page.
Context: Accurate clinical data depends on following a standard procedure, because a small technique error becomes a permanent number in a patient's record that others will act on.
- • T1: Read the vital-signs SOP and gather the measurement tools.
- • T2: Measure , , temperature, and on a partner.
- • T3: Record each reading with correct units in the simulated EMR.
- • T4: Repeat one measurement to check precision and note any difference.
- • T5: Record one limitation and one error source for each technique.
- • E1: Cardiovascular structure, pressure, electrical activity, and blood flow are related, so measurements must be interpreted in the context of the system and the limits of the instrument.
- • E2: Define variables, controls, sampling, units, and the analysis plan before interpreting a result; analysis cannot repair biased or inconsistent measurement.
- • E3: You can collect vital signs following an SOP.
Measurements: Use only the measurements, units, graph, or counts supplied in today's task. No additional patient measurement is implied.
Figure finding: Teaching diagram for Vital signs practical. Use the labels and arrows to identify the decision-relevant relationship. This is a teaching model, not patient or experimental data.
Uncertainty: This is a composite classroom scenario. Missing history, measurements, or confirmation tests remain unknown and limit the conclusion.
Mean = sum of values / number of values. Median = middle ordered value. Range = maximum - minimum.
For 2, 4, 4, and 10: mean = 20 / 4 = 5, median = 4, and range = 10 - 2 = 8.
Mean, median, and range keep the measurement unit. Order the values before finding the median.
Calculate the requested summary for today's supplied values, then write what it reveals and what it hides.
Students often think Students often assume that as long as you count for the full time, it does not matter which finger or which spot you use.. The trap: That is the trap: the thumb has its own detectable , so using it double-counts and corrupts the reading, and an incorrectly sized blood-pressure cuff skews the result, which is why the SOP specifies technique down to the finger and the cuff size.
EMR entry for Patient A (simulated):
- Body temperature: 98.4 F. Limitation: a single oral reading does not capture core temperature. Error source: patient had just finished talking, which can cool the mouth.
- Pulse: 76 bpm (radial, counted 60 seconds). Repeat measurement: 78 bpm. The 2 bpm difference shows good precision and normal beat-to-beat variation.
- Respiration: 16 breaths/min (counted 30 seconds and doubled, without telling the patient). Limitation: counting can be off if the patient is aware. Error source: I started the timer one breath late.
- Blood pressure: 116/78 mmHg (correctly sized cuff). Limitation: one reading does not show a trend. Error source: arm not at heart level can shift the value.
All values include units. The repeat pulse confirms the reading is reliable.
| Vital sign | Value | Unit | Repeat / note |
|---|---|---|---|
| Temperature | 98.4 | F | single oral reading |
| Pulse | 76 (repeat 78) | bpm | 2 bpm apart, good precision |
| Respiration | 16 | breaths/min | counted unobserved |
| Blood pressure | 116/78 | mmHg | correct cuff size |
This model shows the level of evidence and organization needed to complete: A mock electronic medical record entry capturing all four vital signs with values and units, one repeated measurement to check precision, and a noted limitation and error source for each technique.
- Name the variables and include units.
- Enter observations without changing the raw values.
- Check labels, calculations, and patterns before interpreting the data.
Keep the structure. Replace the question, facts, measurements, and evidence. Then recheck units, vocabulary, and whether the conclusion goes beyond the evidence.
Also due today: Upload the completed EMR template and notebook entry to the tracker before leaving.
- CER:
- Claim, Evidence, Reasoning: make a claim, back it with evidence, explain your reasoning.
- SOP:
- Standard Operating Procedure, the exact steps to follow (especially in a lab).
- Tracker:
- Your PLTW progress log where you record completed evidence.
- myPLTW:
- The PLTW course site where you do the online activities. Find it in Clever with your Microsoft sign-in, right next to Schoology.
Tap the speaker to hear a term. Add two of these to your notebook glossary with a definition and an example in your own words.
Pick just 2 or 3 words from today and make them yours: write what each one means in your own words, name the context clue or evidence that helped, then give one example from what you actually did in Vital signs practical. Try your own words first; the glossary is there if you get stuck. This is voluntary and counts as extra credit, so keep it short.
Saved on this device. Show Mr. Mendoza or add these to your notebook glossary to claim the extra credit.
Hand-picked readings and interactives for this lesson, from authoritative open organizations and PLTW's own public course outline.
Check yourself · commit, then reveal▸
Claim ceiling for this check: Today's evidence supports a classroom claim about vital signs practical. It cannot prove causation, diagnose a real patient, or justify action outside this room.
Your partner's pulse should be measured on the radial artery. Which fingers do you use, and why must you never use your thumb?
Write an answer and pick a confidence to unlock the key.
Fast retrieval with instant answers, not the commit-then-reveal check above. Try each from memory first: write what you remember about the earlier units, then check yourself here.
Go further and get help▸
Run this before you touch the bench. It is built from the real lab procedure, so the decisions you make here are the ones you will make with the equipment in your hands.
I can name the procedure's purpose and the evidence I will record. I can identify each named hazard and the control that reduces it: Sanitize thermometer probes with alcohol wipes between every student; do not share uncleaned thermometers. My data table is ready before materials are handled.
Finish the checklist before you handle any material.
- • Sanitize thermometer probes with alcohol wipes between every student; do not share uncleaned thermometers.
- • Sanitize stethoscope ear pieces with alcohol wipes before each use; allow 30 seconds to dry before inserting.
- • Blood pressure cuffs should not be inflated above 180 mmHg; release pressure immediately if a partner reports discomfort or numbness.
- • Students with known circulatory conditions should inform the teacher before the blood pressure station; an alternative measurement activity can be substituted.
- • Wash hands before and after any partner-contact measurement activity.
- • Any measurement equipment that falls on the floor (stethoscope, cuff) must be sanitized before reuse.
- 1Before materials are handled, identify the purpose, variables or comparison, controls, measurement units, and stop-work condition.
- 2Read the vital-signs SOP and gather the measurement tools.
- 3Measure pulse, respiration, temperature, and blood pressure on a partner.
- 4Record each reading with correct units in the simulated EMR.
- 5Repeat one measurement to check precision and note any difference.
- 6Record one limitation and one error source for each technique.
- 7Record each result in the prepared table before interpreting it. Mark missing, repeated, or invalid results truthfully.
- 8Complete the named cleanup and waste route, remove PPE safely, wash hands when required, and confirm the station is ready for the next group.
| Trial or sample ID | Independent condition | Measured result with units | Observation before interpretation | Quality-control note |
|---|---|---|---|---|
Before the procedure, predict the result and cite the rule behind the prediction.
After the procedure, compare the result with the prediction and name one limitation or source of uncertainty.
What today's skills lead to. These are real health-science careers this course builds toward. Tap one to see, on the US Department of Labor's O*NET site, what the job actually involves, what it pays, and how fast it is growing.
Use the virtual vital-signs simulator to collect , , temperature, and , then enter them into a mock EMR with units and one stated limitation.
PhET Biology SimulationsThen submit your Data table. Submit this on the class form named on this page. The form requires the student's district Microsoft sign-in. The thank-you page is the submission receipt. A physical handoff counts only when the day page names that route. Doing the activity in myPLTW does not count as submitted.
Class still runs. Complete the online activity above (it's self-guided). Need the concept taught without a teacher? Use this authoritative explainer:
MedlinePlus: Vital Signs- CompleteEvery required part of the artifact is present, nothing left blank.
- AccurateThe science and the data are correct and match the evidence.
- Scientific reasoningYou explain your claim with evidence and reasoning (CER), not just an answer.
- Professional communicationClear, organized, labeled, and written the way a clinician or scientist would.
- SubmittedTurned in through the one route named under Submit here and confirmed by the form receipt or the named physical handoff. Not in Schoology: that is where the report-card grade appears later.
- Error analysis and method · counts doubleName a specific limit of the method and how it moved your result, and compare what you predicted to what happened. "Human error" does not count; say what about the procedure or instrument caused it.